Safety warning: Doing electrical work on countertop appliances can create the risk of an electric shock, which may be fatal. Always unplug the mixer before starting work on it, and if at all possible the work should be done by a qualified individual. The discussion here is intended to be educational, and not tutorial.
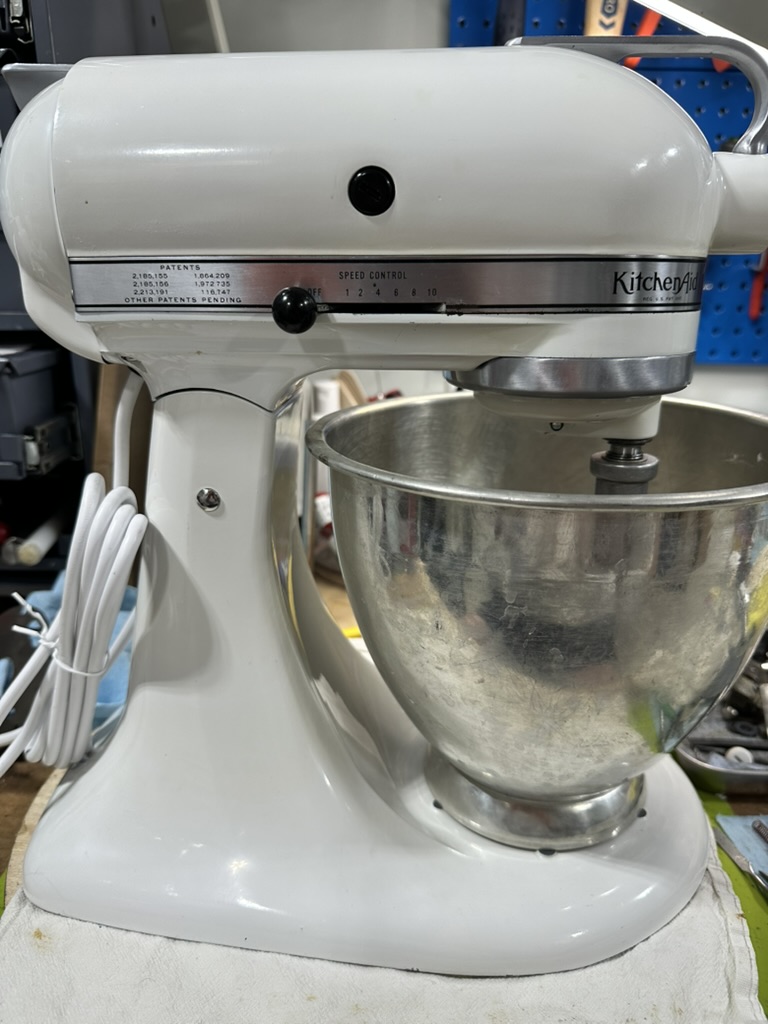
Vintage mixers (in general, anything produced before the “solid state” K45SS was introduced in 1980) are equipped with two-wire power cords. In general, this is safe and the mixer can be used, provided that the power cord itself shows no signs of damage such as cracking or splitting of the sheath.
One thing to keep in mind is that if you present a ground path while using the mixer, you may get a shock. Generally this occurs if you are touching the mixer, and then come into contact with a grounded appliance (with a three-wire cord plugged in) or a water pipe, sink, or faucet.
When I overhaul vintage machines, I will always install a three-wire grounded cord, with the ground lead connected to one of the stator screws (adjacent to where the power connections are made).
One popular video for installing a grounded cord on vintage machines tells the viewer to cut the factory cord off outside the motor housing, modify a factory cord, and splice it on to the stub of the original power cord. I strongly recommend against doing this, for various reasons:
- Cutting the factory cord leaves the remains of the original wiring in place. In cases where the mixer is very old, the insulation on the factory wiring can be degraded, leaving unsafe wiring in place.
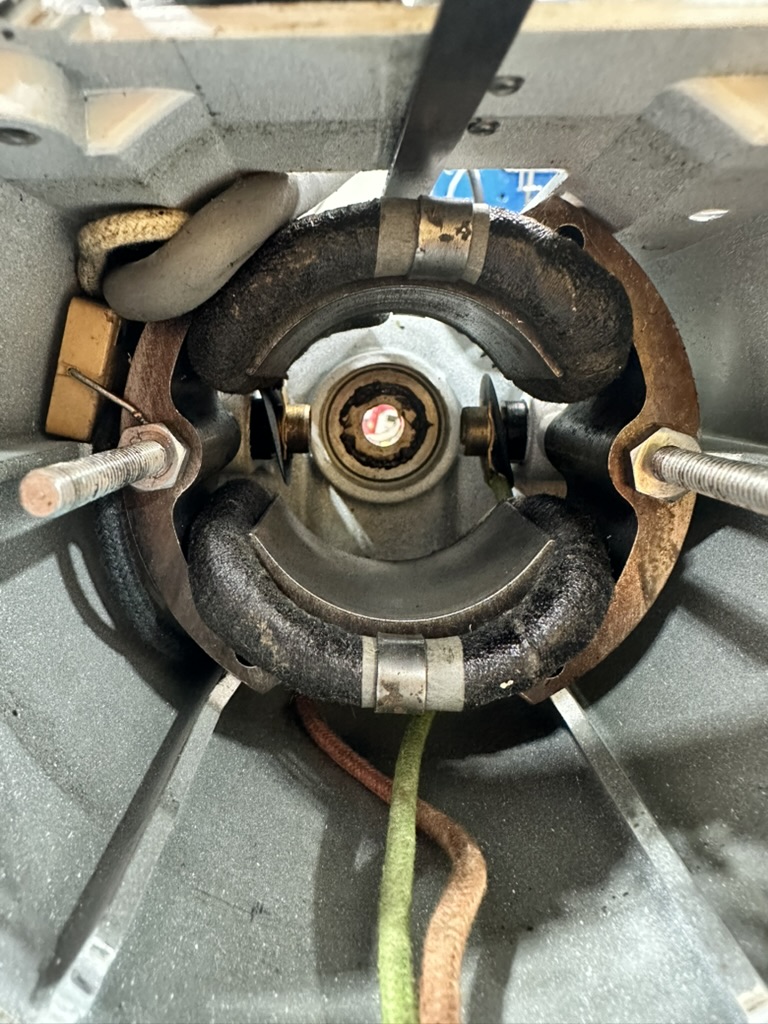
- On older mixers, there is an RF drain capacitor tied to the housing across the neutral power connection. The function of this was to prevent electrical noise from the motor from interfering with AM radio reception, but here in the 21st century that is no longer an issue. However, the RF drain capacitor can often fail, and when it does it usually shorts and ends up putting mains voltage on the outside of the housing. Therefore, it needs to be removed during overhaul. The work to remove the RF drain requires the same disassembly that is required in order to correctly install a replacement power cord, so there’s no reason not to do both.
- The technique shown in the video shows connection of the power cord ground lug to one of the switch bracket screws. This is a bad idea, because those screws are very short, partially threaded, and do not have much thread to spare. Thus, clamping a ground lug (or wire) under one of these screws can compromise its engagement, allowing it to vibrate loose over time.
- Butt splices introduce a rigid section into the wire, which makes it more difficult to route the power cable during installation and assembly. Additionally, getting a proper mechanical and electrical connection depends heavily on getting a good crimp. It’s not something that should be left to chance.
- Butt splices look terrible. Our treasures deserve better.
Here is an object example of unsafe wiring in a vintage K4-B. From outward appearances, the original cord “looked fine”: the sheath was in good condition with no splitting or cracking or other damage, all the way up to where the cord entered the motor compartment.
After disassembly, though, a different story. The insulation on the neutral (white) power lead had been degraded by proximity to the heat of the motor over the fifty years the mixer had been in service, and had cracked away, exposing the wire.
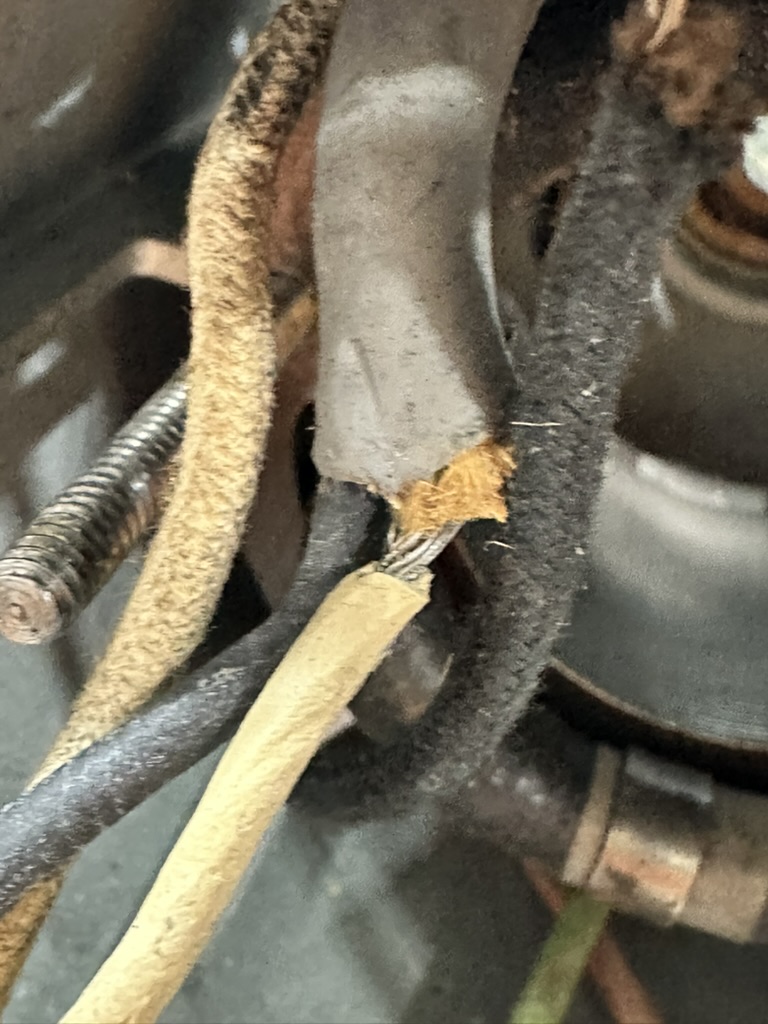
Chopping the old cord outside the housing and butt-splicing in a replacement would have left this damaged wiring in place, potentially creating a shock hazard.
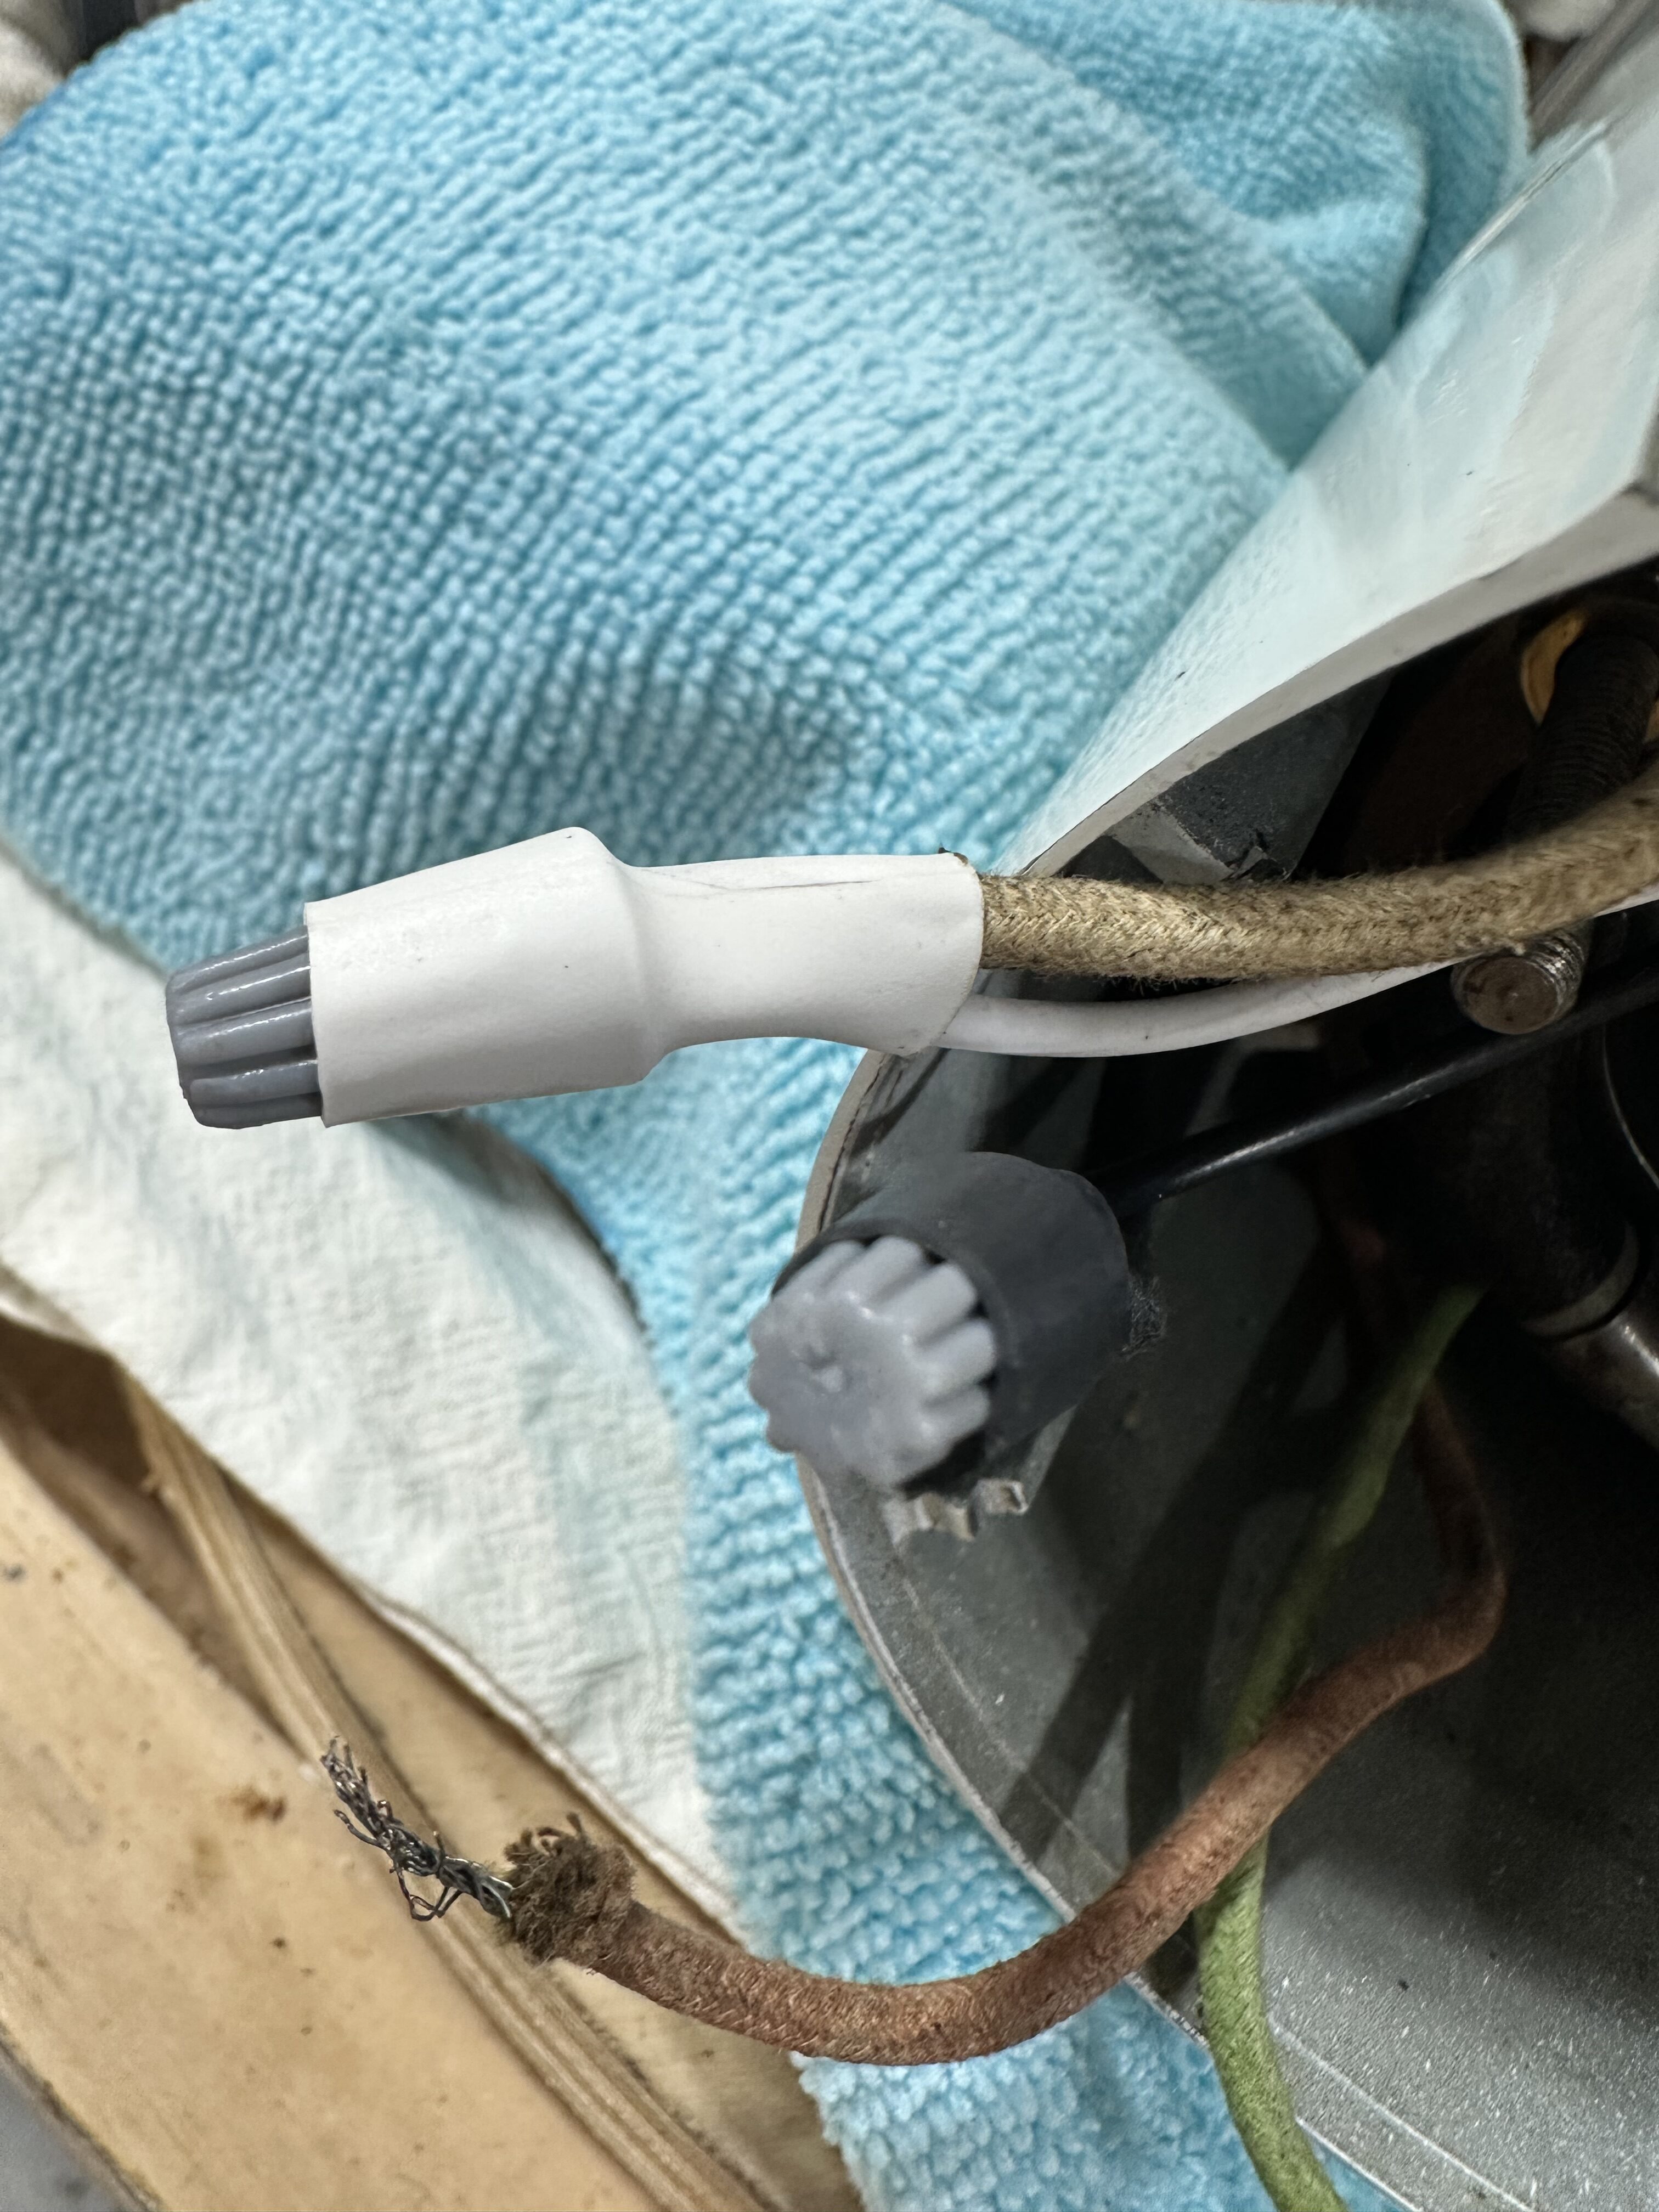
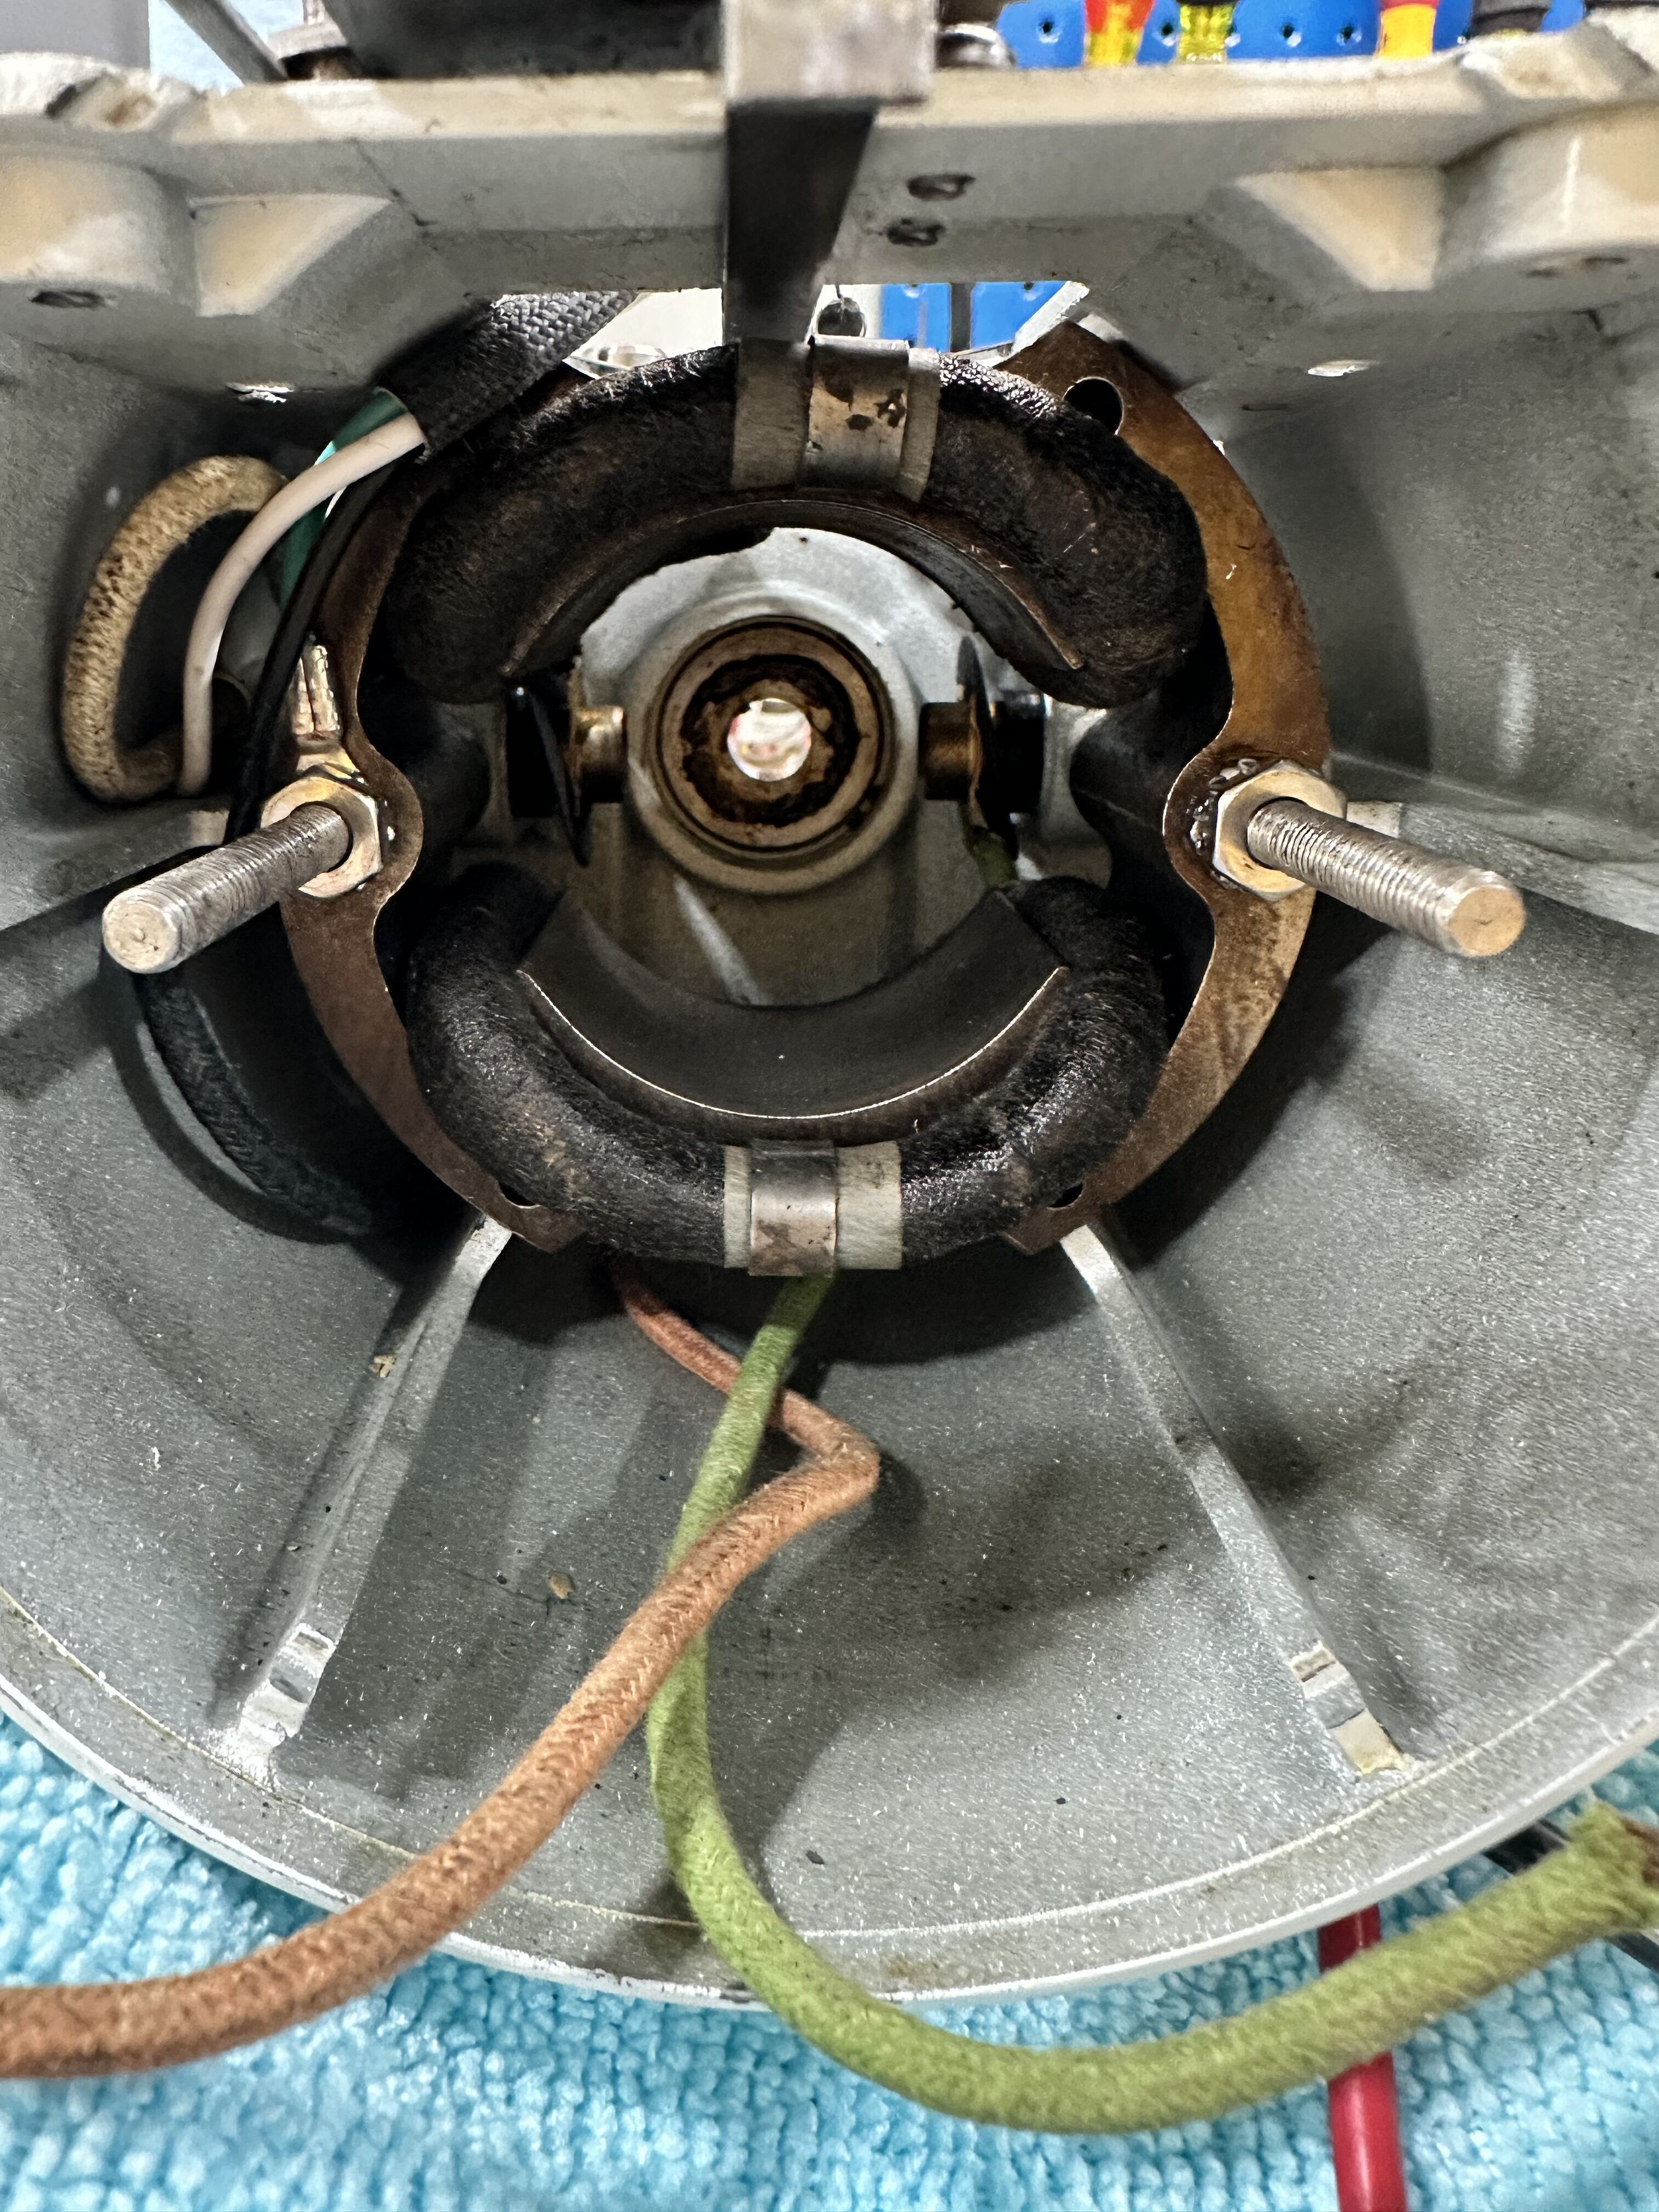
When installing a replacement cord, I start with an 18/3 SVT power cord with a molded plug. (I buy mine from Antique Lamp Supply.) This is cut to length to match the original cord, the sheath stripped to match the original cord, a protective heat sleeve is added to guard the leads close to the motor, and the power leads tied to the original using new wire nuts. Use an appropriate ring lug (#10 screw size) for the ground lead, and clamp it under one of the stator nuts.
(Side note: 18-gauge wire matches the original. There is no reason to use a heavier gauge wire, and in fact doing so complicates the job because the thicker wire is harder to work with and won’t route the same way as the original.)
Here’s what that looks like in progress and when it’s finished:
Replacing the power cord this way ensures safety (when done correctly) and leaves a nice, cleanly finished job.
Since you read this far, here’s the prize: a photo of the mixer after completion of the overhaul.