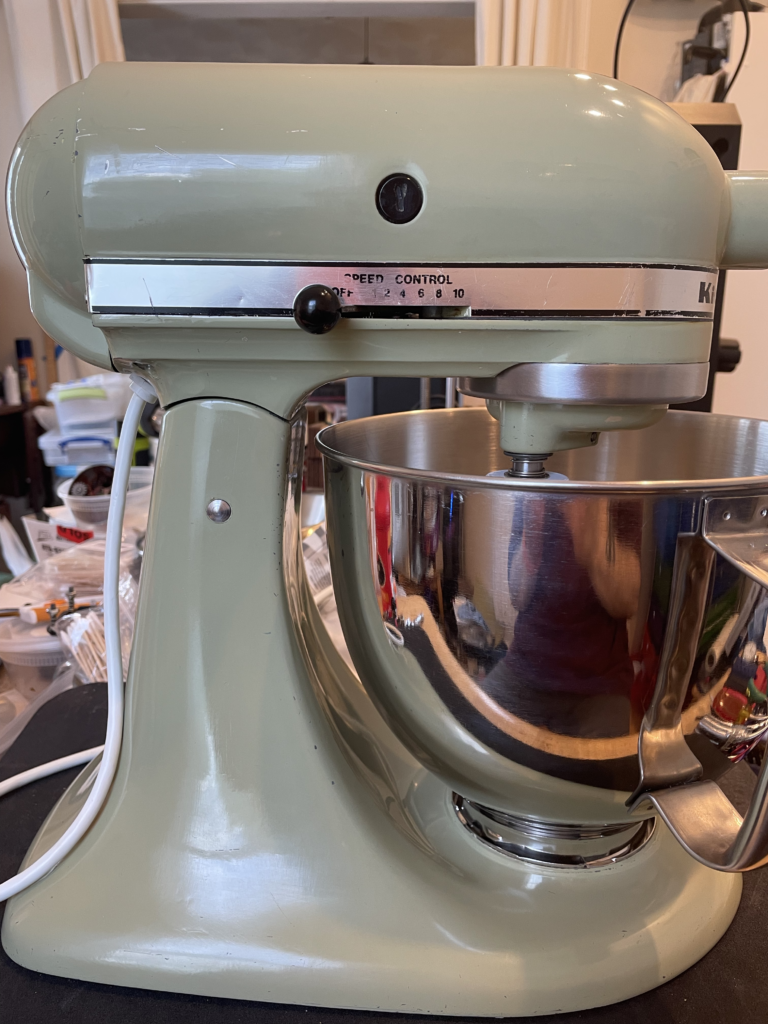
Most of the advice here applies to tilt-head K45-type models (Classic, Artisan, Ultra Power, etc but not the Artisan Mini or Accolade) and K5-type bowl-lift models (K5SS, KSM5, KPM5, KSM50 and their relatives). These models are distinguished by plastic motor brush covers (one on either side of the upper motor housing) and a round rear cover secured by a screw at the top.
If a “Pro” series model (KG25, KV25, KP26, and similar) or Accolade won’t switch on, you can skip to the last section.
Basic Troubleshooting Steps
Note: always unplug the mixer before starting any troubleshooting, and in between troubleshooting steps.
Check the Outlet
K45 / KSM90 / KSM150 and similar (“Classic”, “Ultra Power”, “Artisan”): the first thing to check is that the outlet is working correctly. Plug something else into the outlet; if it doesn’t turn on either then the issue is with the outlet. Check for tripped breakers or opened GFCI outlets.
Check the Motor Brush Orientation
If the outlet is OK (it usually is, but bears checking), the next thing to do is ask yourself: “Did I, or someone else, remove the motor brushes, whether out of curiosity or to diagnose some other problem?”
The motor brushes are under plastic covers on either side of the “head” of the mixer. In mixers of this model type with solid-state speed control, the motor brushes must go into their holders in a specific orientation. If they aren’t lined up correctly, they won’t make contact with the motor armature and the mixer won’t run.
So if the answer is “yes, I (or someone else) removed the motor brushes”, remove them again on both sides and check the orientation. With the motor brush removed, shine a light into the brush holder and look inside. About an inch inside you’ll see a little “bump”. This must line up with the angled face of the motor brush; so check this and make sure it’s correct. (Do this even if you are sure that you didn’t remove the motor brushes before.)
Here is an illustration (from a technical service bulletin dating back to 1978) showing the motor brush orientation. The “new style” brush and holder are used on all modern KitchenAid mixers of this type.
If correcting the motor brushes doesn’t resolve the problem, the next thing to check is the operation of the speed control plate.
Check the Speed Control Plate
Unplug the mixer, and then remove the rear cover. (Unscrew the screw at the top, tilt the cover away from the mixer slightly, lift it up, and remove.)
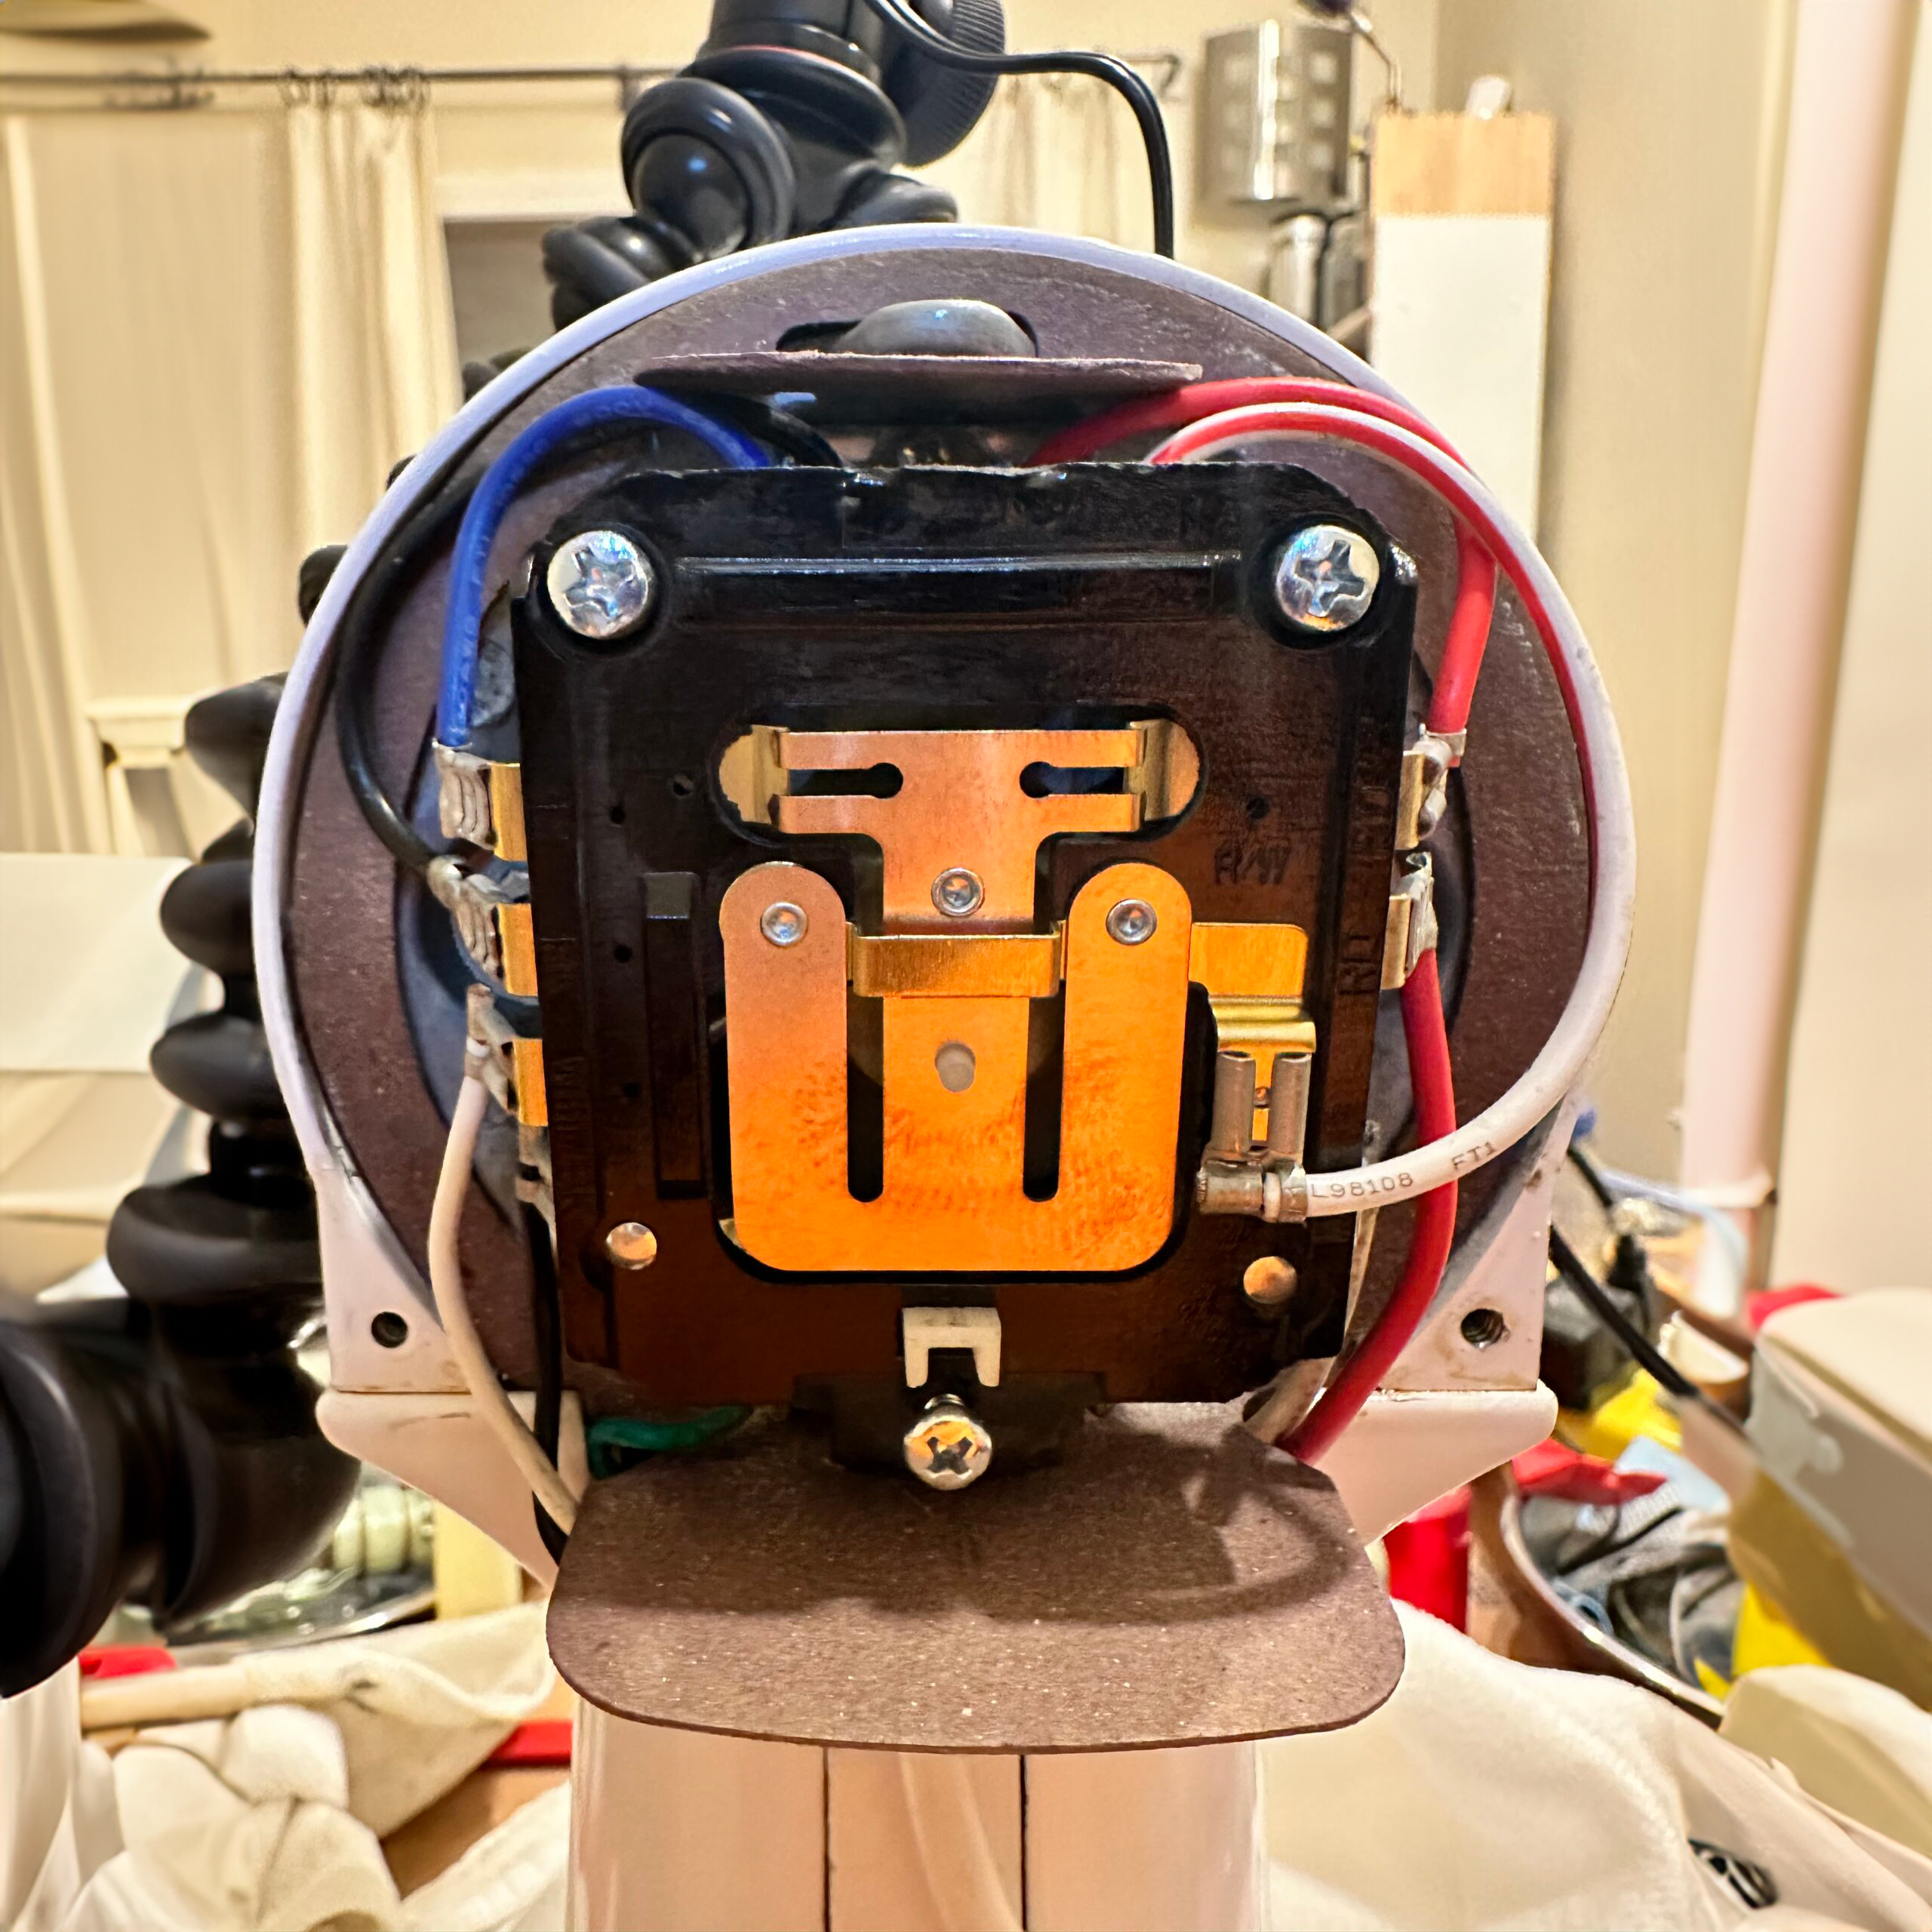
Looking directly at the back of the mixer, you’ll see a flat brown plastic plate, with flat metal springs in the center. This is the speed control plate. On the inside of the plate, behind the lower left corner, there’s a contact point. You can see this if you turn the mixer so that the left side is facing you.
As you move the speed control lever from “off” to “stir”, a switch bar will lower and make contact; you can watch this happen. When you move from “stir” to “off”, the switch bar will raise and break contact.
If the switch does not make contact, the mixer won’t turn on. This can be resolved by carefully adjusting the contact point, though in some cases the speed control plate needs to be replaced. Here’s a video showing how to replace the plate, if necessary.
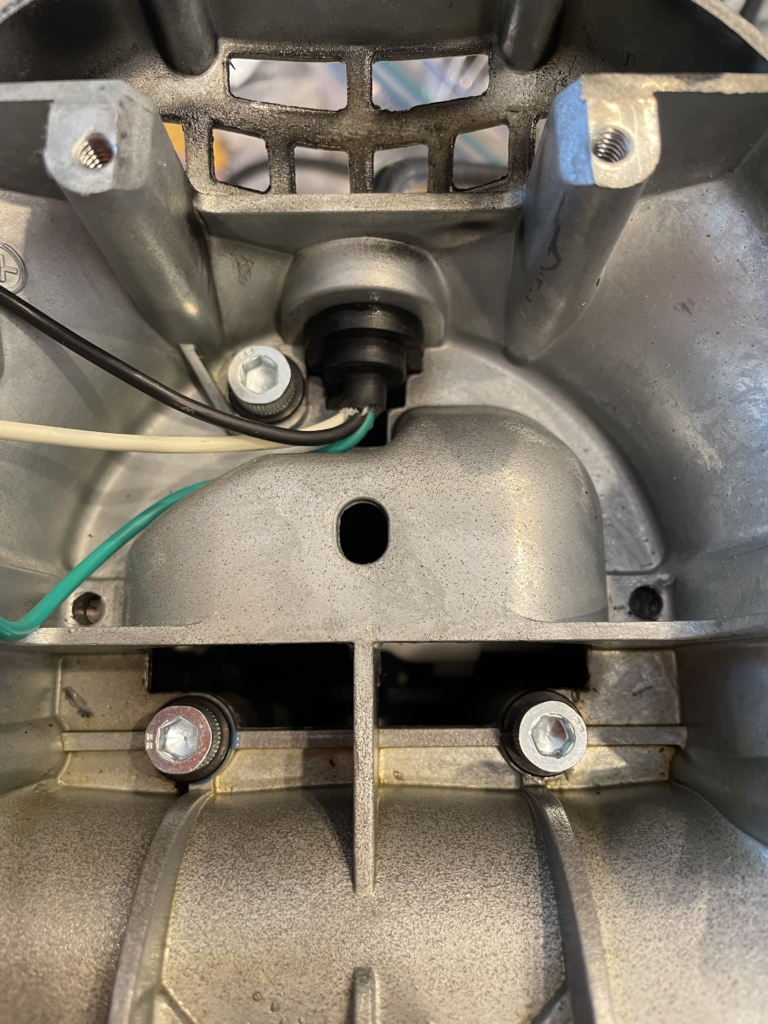
If the switch in the speed control plate is working, the next thing to check is the phase control board. While failures here are not typical, they can happen (particularly if the mixer was plugged into the wrong voltage before). The phase control board is a small circuit board, just below the top of the mixer. A flap on the rear motor gasket covers it partially. Inspect the board for burn marks and other signs of failure. Here is a video showing how to replace the phase control board (the part number for 120V/US mixers is WPW10325124; for 230V/overseas models it is W11174552).
Mixers with Electronic Speed Control
Models with an electronic speed control (Accolade, “Pro”, “Pro Line”, and the 2023-on production bowl-lift models): the speed control has a safety feature which prevents the mixer from starting if the speed control is in any position other than “Off” when the mixer is plugged in. So if the mixer doesn’t turn on, first unplug the mixer; then move the control to “Off”, and then plug the mixer back in.
If at that point the mixer does not turn on, the electronic speed control has likely failed and will require replacement. For the Accolade and KV25 / KP26 / similar models made in the US, the repair part number is WP9706648. Here’s a video that shows how to replace it (for most mixers you will not need to update the power cord, so ignore that bit).
Here are some tips to help keep your tilt-head KitchenAid mixer in dependable working order.
Check the Hub Thumbscrew
Before each use, check the attachment hub thumbscrew, and make sure that it is firmly finger tight. It can loosen with time due to the vibration of the mixer, and a loose thumbscrew can allow the attachment hub cover to fall into the bowl, where it often jams the beater. This in turn will damage or destroy the “sacrificial” gear, and require a repair.
Observe the Speed Limit
KitchenAid recommends using speed “2” when kneading with the dough hook. Lower speeds won’t apply enough force to develop the gluten; higher speeds will significantly shorten the interval between maintenance and repairs, and are likely to cause premature component failure (and potentially disaster, if the bowl comes loose).
Keep an Eye on it, Always
While the mixer is running, give it your full attention. An unattended mixer is like a toddler: capable of creating amazing amounts of mayhem if left unsupervised. A running mixer can move, leading to excursions over the side of the counter and costly damage to the mixer and/or floor.
Keep it Clean
After each use, unplug the mixer. Then clean it thoroughly using only a soft damp (not wet) cloth and very light pressure. If there’s anything sticky that won’t wipe off easily, you can use a little dish soap on a damp sponge, but take care to keep water out of the mixer, especially around the lever slots. Clean everywhere, including the back of the mixer around the power cord. Pay special attention to the underside of the “head”, the planetary, and the beater shaft. You can use a microfiber cloth or a soft dish towel to dry everything off and keep it shiny.
Every few uses, carefully flip the machine over (use a soft towel to protect the head) and wipe the underside of the base clean (again with a damp cloth). This keeps dust, flour, etc from accumulating there, which attracts moisture that in turn cause rust and corrosion. Also, check and tighten (if necessary) the set screw on the hinge pin; if it loosens up the head will start to wobble.
While the machine is upside down, inspect the feet and wipe off any accumulated crud. If the feet are dry, cracked, or hard, replace them. (They pull off, and replacements are readily available.) This will make the mixer less likely to “walk” around the counter (or off the edge).
If you use the machine more than once a week, and/or use it for heavy loads such as bread dough or for extended high-speed operation, or if you make if you use the mixer to make money, I recommend that you have the gears cleaned, regreased, and checked annually. This will keep the moving parts in good operating condition, and will give you a chance to catch any problems before they get really bad (and expensive to fix).
For typical light-to-moderate household use, I recommend that you do this every three to five years. For all K45-type models (which includes everything except the Accolade and Artisan Mini), you can find a list of parts and materials for the job here: https://www.mixerology.com/k45-k5-clean-and-re-grease-parts/.
Note for new mixer owners: if you purchased a tilt-head Classic, Ultra Power, Artisan, or similar model (with a round rear cover secured by a screw at the top) manufactured in 2020 or later, I recommend that you clean and regrease the gears after the first year of ownership. There is an increasing amount of evidence that recently manufactured mixers have been filled with far less than the recommended 6 fl-oz of grease, which accelerates wear on the “sacrificial” gear and other parts. Early maintenance (after the warranty period) will address this.
The integrated motor/drivetrain assembly in the Artisan Mini (model type KSM3311/3316) is considered maintenance-free; there are no maintenance or repair parts or procedures.
No matter what schedule you follow, if at any time you see oil leaking out around the trim band, it’s time to service the machine.
Store the Accessories Separately
It may be tempting to leave a frequently used accessory on the beater shaft even when the mixer isn’t in use. If you do this, the standard accessories (flat beater, dough hook, or wire whisk) will get galvanically welded to the beater shaft and you’ll have an extremely difficult time removing them. (This won’t happen with the stainless accessories, but it is still possible for rust to form on the beater shaft and create problems. So if you have stainless accessories, store them separately as well.)
You can store the accessories in the mixer bowl, or in any convenient location that isn’t the beater shaft.
Take care of your mixer, it’ll take care of you.
These machines last so long that we often get attached to them; and for many folks they become treasured family heirlooms. Regular care and maintenance is the key to a long and happy mixer life.
Here are lists of compatible bowls and accessories (beater/dough hook/whip), grouped by model type. Model number designations refer to the label underneath the base of the mixer. These lists are formatted as tables; the left column is the item number, which you can use for a web search.
If you aren’t sure what model mixer you have, use the free Mixerology app for iOS or for Android to scan the label under the base. It will interpret the model number (if available) and link you directly to the right section on this page.
Where to buy: most items with retail part numbers (beginning with “K” or a number) can be found by searching on KitchenAid’s web site. Other good places to look are Seneca River Trading and Goodman’s. You can also search using the service part number (beginning with a “W”), when one is provided. Some items can also be found on Amazon, but be careful — there are many knockoffs which are inferior in quality or fitment.
K45-type Tilt Heads
This list is for any tilt-head model which has a round rear cover secured by a screw at the top. This includes the original K45, K45SS, KSM90, KSM150, and many many others. If your mixer’s model number begins with “4” or “5”, disregard the first letter when determining the model number. Thus “5KSM150” is just “KSM150”.
K45B
Flat beater
K45DH
Dough hook, white
K45BDH
Dough hook, “subtle silver”
K45WW
Wire whip (zinc/aluminum hub, not dishwasher safe)
K5THCB
Flat beater, 4.5/5qt, white (interchanges with K45B)
K5THBS
Flat beater, 4.5/5qt, “subtle silver” (interchanges with K45B)
KSM5THFBSS
Flat beater, 4.5/5qt, stainless steel (interchanges with K45B)
KSMTHFBSS
Flat beater, 4.5/5qt, stainless steel, 2026 release (interchanges with K45B)
KSM5THDHSS
Dough hook, 4.5/5qt, stainless steel (interchanges with K45DH)
KSMTHDHSS
Dough hook, 4.5/5qt, stainless steel, 2026 release (interchanges with K45DH)
Three-piece stainless-steel accessory set (includes KSM5THFBSS, KSM5THDHSS, KSM5THWWSS)
KSMTH3PSS
Three-piece stainless-steel accessory set (2026 release, includes KSMTHFBSS, KSMTHDHSS, KSMTHWWSS)
KB3SS
Bowl, 3qt stainless, no handle
K45SBWH
Bowl, 4.5qt stainless, flat handle
K5THSBP
Bowl, 5qt stainless, comfort handle
KSM5GB
Bowl, 5qt glass (supersedes K5GB)
KSM5GBF
Bowl, 5qt frosted glass (discontinued; no longer available)
WPW10220977
Replacement thread ring for glass twist-base bowl (KSM5GB/KSM5GBF)
KN1PS
Pour shield (use service part number WPW10616906)
KSMTHPS
Pour shield (current version; may not fit some older bowls)
KICA0WH
Ice cream maker (discontinued version)
KSMICM
Ice cream maker (current version)
KSMHAP
Attachment hub cover and thumbscrew kit
9709194G
Attachment hub thumbscrew, black (search for this number on KitchenAid’s web site)
9709707G
Replacement foot (search for this part number on KitchenAid’s web site; sold singly)
KA-86012-5PK
Replacement foot, set of 5 (aftermarket, via Goodman’s)
All of these items are dishwasher safe, except for the K45WW wire whip. Hand washing will prolong the service life of the coated beaters and dough hooks.
Warning: do not use a spiral dough hook with any tilt-head model. Spiral hooks apply enormous upward force under heavy load, and the mixer’s hinge and tilt lock are not designed for these loads.
Where to buy: most items with retail part numbers (beginning with “K” or a number) can be found by searching on KitchenAid’s web site. Other good places to look are Seneca River Trading and Goodman’s. You can also search using the service part number (beginning with a “W”), when one is provided. Some items can also be found on Amazon, but be careful — there are many knockoffs which are inferior in quality or fitment.
This list is for bowl-lift models which have a round rear cover secured by a screw at the top. This includes the original vintage K5-A, K5SS, KSM5, KSM50, KP50, KPM50, KSM450, KSM500, K4SS, and KSMC50S. (If your mixer’s model number begins with “4” or “5”, disregard the first letter when determining the model number. Thus “4KSM450” is just “KSM450”.)
K5AB
Flat Beater
K5ADH
Dough hook, C-shaped
K5AWW
Wire whisk (not dishwasher safe)
K5ASBP
Bowl, 5qt, polished
K5ASB
Bowl, 5qt, brushed
KICA0WH
Ice cream maker (discontinued version, but may still be available from some sources)
KSMHAP
Attachment hub cover and thumbscrew kit
KN1PS
Pour shield (use service part number WPW10616906)
KSMTHPS
Pour shield (updated; may not fit some bowls)
WP4162038
Replacement foot (sold singly)
UV-86321
Replacement foot (aftermarket, set of 4, via Goodman’s)
9709194G
Attachment hub thumbscrew, black (search for this number on KitchenAid’s web site)
All of these items are dishwasher safe, except for the K5AWW wire whip. Hand washing will prolong the service life of the coated beaters and dough hooks.
Note: KitchenAid never made stainless-steel accessories for this model. There is an aftermarket stainless flat beater from Superdoughhook which I have not tried. It is designated the “JP25A” and is available in their web store and via Etsy.
If you are looking for a flex-edge beater for this model type, the BeaterBlade 5L-M is compatible.
Where to buy: most items with retail part numbers (beginning with “K” or a number) can be found by searching on KitchenAid’s web site. Other good places to look are Seneca River Trading and Goodman’s. You can also search using the service part number (beginning with a “W”), when one is provided. Some items can also be found on Amazon, but be careful — there are many knockoffs which are inferior in quality or fitment.
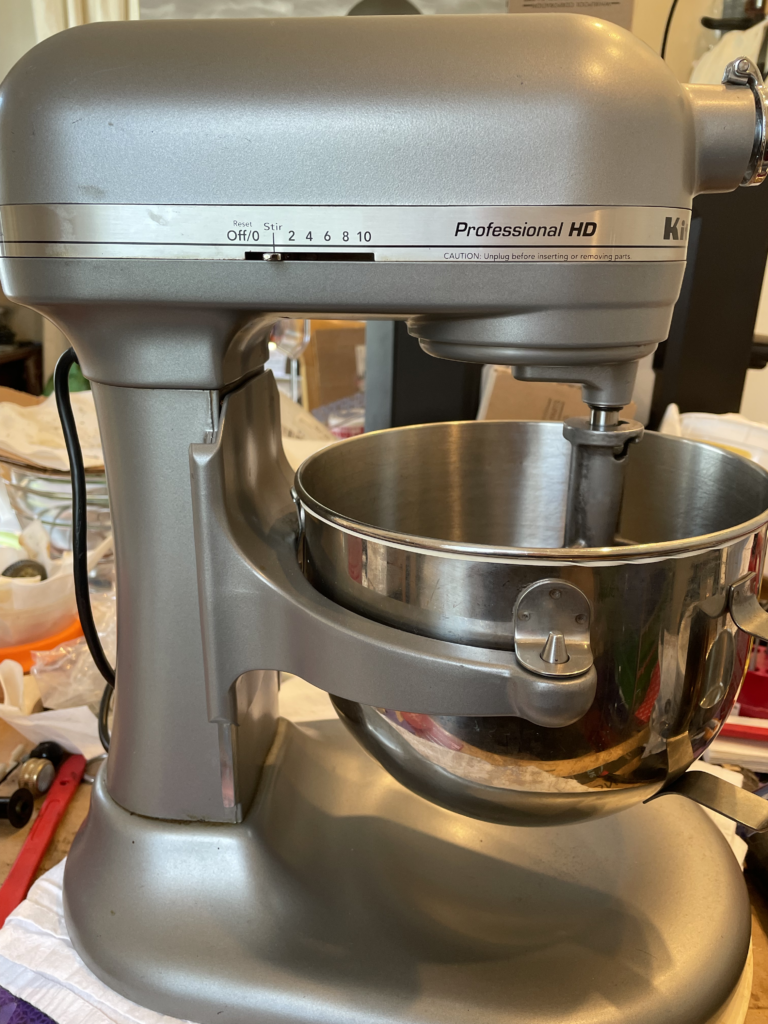
“Professional HD” (KG25/KM25) and “Professional 6000HD” (KSM6573)
This list is for the “Professional HD” and its contemporary “Commercial” branded variant. This includes the KG25 and KM25 models only. (If your mixer’s model number begins with “4” or “5”, disregard the first letter when determining the model number. Thus “4KG25” is just “KG25”.)
The “Professional 6000HD” shares a bowl cradle with the KG25/KM25 model type, and due to the unique design of the “tulip” bowl, uses specific accessories which are no longer available. Service part number W11350316 is a kit which includes a bowl, flat beater, and dough hook to replace the “tulip” bowl and its unique F-type accessories.
K5AB
Flat Beater, KG25/KM25
K5ADH
Dough hook, C-shaped, KG25/KM25
KNS25DHNSF
Dough hook, spiral, KG25H/KM25
K5AWW
Wire whisk, KG25/KM25 (not dishwasher safe)
KN25PBH
Bowl, 5qt, polished, KG25/KM25 (service part number WPW10716820)
KN25NSF
Bowl, 5qt, NSF, KG25/KM25
W11350316
Kit includes KN25PBH, K5AB, KNS25DHNSF
KN1PS
Pour shield (use service part number WPW10616906)
KSMTHPS
Pour shield (updated; may not fit some bowls)
9708649G
Replacement foot (search for this number on KitchenAid’s web site; sold singly)
KA-86001-5PK
Replacement foot (aftermarket, set of 5, via Goodman’s)
9709194G
Attachment hub thumbscrew, black (search for this number on KitchenAid’s web site)
Caution: frequent and prolonged use of the spiral dough hook for kneading can eventually cause the beater shaft bearing to migrate up into the planetary over time. When this happens, the top of the beater shaft will start grinding against the underside of the lower housing and cause damage. Visually inspect the beater shaft bearing on the bottom of the planetary before each use, and if it has receded into the planetary, discontinue use of the mixer until you have replaced the planetary.
Note: KitchenAid never made stainless-steel accessories for this model. There is an aftermarket stainless flat beater from Superdoughhook which I have not tried. It is designated the “JP25A” and is available in their web store and via Etsy.
If you are looking for a flex-edge beater for this model type, the BeaterBlade 5L-M is compatible.
Where to buy: most items with retail part numbers (beginning with “K” or a number) can be found by searching on KitchenAid’s web site. Other good places to look are Seneca River Trading and Goodman’s. You can also search using the service part number (beginning with a “W”), when one is provided. Some items can also be found on Amazon, but be careful — there are many knockoffs which are inferior in quality or fitment.
This list is for mixers branded “Professional 5 Plus”, “Professional 600”, “Epicurean”, and other models with KV25, KP26, KT26, KD26, KL26, and many others; as well as the 7qt “Pro Line” (KSM7581, KSM7586, KSM7588, KSM7990), 8qt “Commercial” (KSM8990, KSMC895), and the unbranded bowl-lift models produced starting in 2023 (KSM55S, KSM60S, KSM70S).
There are actually too many compatible model numbers to list here, but if your mixer is a bowl-lift model that is not listed in an earlier section, odds are that it’s one of these. If you aren’t sure, use the free Mixerology app for iOS or for Android to scan the label under the base. It will interpret the model number (if available) and link you directly to the right section on this page.
Pro 11 Wire Whip (dishwasher safe, interchanges with KN256WW)
KSM7QEW
Pro 11 Wire Whip (dishwasher safe, exchangeable with KN211WW)
KSMBLPS
Pouring Shield (Secure Fit)
KSMPB7SS
Pastry beater, stainless steel
KSMC7QFB
Flat beater — Stainless
KSM7BL3PSS
Three-piece stainless steel accessory set (includes KN211WW, KSMC7QFB, KSMC7QDH)
KSMICM
Ice cream maker
9708649G
Replacement foot (search for this number on KitchenAid’s web site; sold singly)
A-86001-5PK
Replacement foot (aftermarket, set of 5, via Goodman’s)
9709194G
Attachment hub thumbscrew, black (search for this number on KitchenAid’s web site)
All of these items are dishwasher safe, except for the KN256WW wire whip. Hand washing will prolong the service life of the coated beaters and dough hooks.
Caution: frequent and prolonged use of the spiral dough hook for kneading can eventually cause the beater shaft bearing to migrate up into the planetary over time. When this happens, the top of the beater shaft will start grinding against the underside of the lower housing and cause damage. Visually inspect the beater shaft bearing on the bottom of the planetary before each use, and if it has receded into the planetary, discontinue use of the mixer until you have replaced the planetary.
Where to buy: most items with retail part numbers (beginning with “K” or a number) can be found by searching on KitchenAid’s web site. Other good places to look are Seneca River Trading and Goodman’s. You can also search using the service part number (beginning with a “W”), when one is provided. Some items can also be found on Amazon, but be careful — there are many knockoffs which are inferior in quality or fitment.
This list is for the Accolade 400 (model numbers beginning with “KN15”). If your mixer’s model number begins with “4” or “5”, disregard the first letter when determining the model number.
K45B
Flat beater
K45DH
Dough hook
K45WW
Wire whip (zinc/aluminum hub, not dishwasher safe)
K5THCB
Flat beater, 5qt, white (interchanges with K45B)
K5THBS
Flat beater, 5qt, “subtle silver” (interchanges with K45B)
KSM5THFBSS
Flat beater, 5qt, stainless steel (interchanges with K45B)
KSM5THDHSS
Dough hook, 5qt, stainless steel (interchanges with K45DH)
Three-piece stainless-steel attachment set (includes KSM5THFBSS, KSM5THDHSS, KSM5THWWSS)
KN13PB
Bowl, 3qt stainless, Accolade 400 only (discontinued; no longer available)
KN15PBEH
Bowl, 5qt stainless, Accolade 400 only (discontinued; no longer available)
KN1PS
Pour shield (use service part number WPW10616906)
KSMTHPS
Pour shield (current version; may not fit some older bowls)
KICA0WH
Ice cream maker (discontinued version; adapter required for Accolade 400, service part number 9707760)
KSMHAP
Attachment hub cover and thumbscrew kit (cover not used on Accolade 400)
9709194G
Attachment hub thumbscrew, black (search for this number on KitchenAid’s web site)
9709707G
Replacement foot (search for this part number on KitchenAid’s web site; sold singly)
KA-86012-5PK
Replacement foot (aftermarket, set of 5, via Goodman’s)
All of these items are dishwasher safe, except for the K45WW wire whip. Hand washing will prolong the service life of the coated beaters and dough hooks.
Warning: do not use a spiral dough hook with any tilt-head model. Spiral hooks apply enormous upward force under heavy load, and the mixer’s hinge and tilt lock are not designed for these loads.
Where to buy: most items with retail part numbers (beginning with “K” or a number) can be found by searching on KitchenAid’s web site. Other good places to look are Seneca River Trading and Goodman’s. You can also search using the service part number (beginning with a “W”), when one is provided. Some items can also be found on Amazon, but be careful — there are many knockoffs which are inferior in quality or fitment.
Where to buy: most items with retail part numbers (beginning with “K” or a number) can be found by searching on KitchenAid’s web site. Other good places to look are Seneca River Trading and Goodman’s. You can also search using the service part number (beginning with a “W”), when one is provided. Some items can also be found on Amazon, but be careful — there are many knockoffs which are inferior in quality or fitment.
This applies to all “Professional” and UK “Pro Line” bowl-lift mixers (“Professional 5 HD”, “Professional 5 Plus”, “Professional 6”, and “Professional 600” in the US, “Pro Line” and “Artisan” in the UK) and the Accolade 400. The series model numbers for these machines begin with KG25, KV25, KB26, KD26, KP26, KL26, and KN15. (This list is inclusive but not comprehensive. KitchenAid has a lot of different model numbers for what is essentially the same mixer inside.)
If you are going to DIY this job, you will need the following items:
Gear housing gasket: part #WP9709511 (see important note below)
If you are repairing a failed worm follower gear, or if the mixer is an older machine and you are overhauling it for the first time:
Worm follower gear, part #W11086780
Important note about the gear housing: before beginning the job, unplug the mixer and remove the top cover; inspect the transmission housing at the front of the mixer. If it is plastic, you need to replace it with the upgraded metal housing. The metal housing kit (which includes a gasket) is part #8212396.
For home DIY I like the Super Lube 41160; you can buy it on Amazon. There are various valid alternatives, and you can read about them here.
If the greases mentioned on the grease page aren’t available, any traceable, documented grease that meets the requirements will suffice. I recommend avoiding anonymous “white label”, repackaged, or otherwise unidentified grease unless the seller provides appropriate technical and safety documentation.
You will need about two ounces of grease.
Gear Housing Replacement
If you are replacing a plastic gear housing, check the sleeve bearings on either end of the main gear shaft. If there are signs of cracking or deformation, replace both bearings, as well as the thrust bearing. The part numbers for these are WPW10170080, WPW10170081, and WP9703445 respectively.
Planetary Replacement
If you are replacing a separated planetary assembly, here are part numbers for color-matched replacements. Note that in some cases, the exact color match is no longer available. In that case you can choose a replacement color that is a close match or a suitable contrast. The color code is the last two letters (not numbers) in the model number, on the label under the base. A replacement planetary assembly will cost in the range of US$40-60, depending on the finish.
If a match for your color code isn’t listed here, please get in touch and I’ll be happy to look it up for you. Provide the full model number from the label under the base.
Matte white (replaces “Meringue” and “Matte Milkshake”)
W11123171
Matte black (replaces “Licorice” for color code LC)
W10327955
Color code CU (Contour Silver)
WP9708175
Color code MC (Metallic Chrome, replaces most silver hues including DP, SL, and PM)
9708753
Color code NP (Nickel Pearl)
WP9708173
Color code GR (Imperial Gray)
W10577733
Color code AQ (Aqua Sky)
WP9708174
Color code BK (Imperial Black)
9708715
Color code DP (Dark Pewter, no longer available: use WP9708175)
9707977
Color code PM (Pearl Metallic, no longer available: use WP9708175)
WP9709575
Color code SL (Silver, no longer available: use WP9708175)
Check the Bowl Column Screws
If this is the first time the mixer is being serviced and it is a bowl-lift model, remove the motor and check the three large screws beneath. They are probably loose. Remove each screw, apply some Loctite 242 or Vibra-Tite 121, and tighten each screw firmly using a #3 Phillips-head screwdriver. 1/4″ external-tooth lock washers are a good addition. You can also replace the screws with 1/4-20 x 3/4″ socket-head cap screws, which use an Allen key drive. This allows you to tighten each screw more firmly, but take care not to overtighten the screws which will strip the threads.
This page contains resources useful for anyone who is preparing to do maintenance or overhaul on any full-sized tilt-head or bowl-lift model which has a round rear cover secured at the top with a screw.
Models included: the original Model “K”, K4-B, K45, K45SS, “Classic”, “Classic Plus”, “Artisan”, “Ultra Power”, and all similar machines except the Accolade and Artisan Mini; as well as the older bowl-lift machines in the K5 series: K5A, K4SS, K5SS, KSM5, KPM5, KSM50, KSMC50S, KSM450, KSM500 and all similar. Note that this does not include the vintage 4C/3C/3B models.
If you are going to DIY this job, you will need the following items:
Gear case gasket: part #W11582479 (see note below)
Center shaft O-ring: part #WP67500-55 (see note below)
Planetary retaining pin: part #WP9705443 (5/32 x 7/8″ type-E grooved drive pin)
Grease (6 fl-oz, NSF H-1/ISO 21469 rated for food safety, NLGI #2 viscosity, see below)
About the gear case gasket: The original part number for the gasket was WP4162324. In late 2025, this was superseded by W11805888, which includes a change for compatibility with the new “Artisan Plus”. It also costs twice as much (or more) than the original. In April 2026, W11582479 became available. This appears to be a reissue of the original WP4162324, and as such is a direct fit for older machines, and not compatible with the Artisan Plus (without careful modification).
Depending on the source, the old part number WP4162324 may be listed as “discontinued” or “no longer available”; or the old part number may be listed at the new price. If you find this, look for W11582479. It should cost around US$10-15.
As an affordable alternative, Goodman’s sells an aftermarket gasket which is of good quality and is a suitable replacement, and it is very inexpensive. You can find it here or by searching for either of the above part numbers on their web site.
If you are repairing a failed or heavily worn “sacrificial” gear, you will need these additional parts:
Worm follower gear, part #WPW10112253 (see important note below)
Pinion drive pin, part #WP9705444 (3/32 x 3/4″ type-E grooved drive pin)
Important note about the gear: do not buy the cheap aftermarket gears that you can get on Amazon. They are not built to factory specifications and will fail, sometimes immediately. Always use the genuine part. Read more on why.
Another important note: If you are repairing an older mixer, it is worth the effort to replace only the gear, rather than the entire drive assembly. Not only is the part less expensive, the drive bearing is of much higher quality than the replacement part. You can read more about that here.
The O-ring is a standard item which you can probably find in most hardware stores: 1/2in OD, 3/8in ID, 1/16in CS. The pins are commodity parts as well but may be harder to find, so it’s often simpler to order them as repair parts.
Repair part number 4160474 is a rebuild kit which includes a replacement center shaft, center shaft pin, planetary retaining pin, O-ring, and gasket. This is ideal for older mixers.
If the speed control lever is bent or missing its knob, you can replace it while the mixer is open. The repair part number for the lever with the black knob is WP9709276; for the gray knob is WP9709277; and for the “buff”/tan-colored knob is 3184195.
Likewise if the tilt latch lever is bent or missing its knob, the repair part number is WP24452 for the entire latch assembly with a black knob.
Grease Recommendations
The factory service manual specifies 6 fluid ounces (about 3/4 cup) of grease. Mixers produced after around 2020 or so have been using much less, to the detriment of performance and reliability.
For home DIY I like the Super Lube 41160 (one 14oz can is enough for more than two mixers); you can buy it on Amazon. There are various valid alternatives, and you can read about them here.
If the greases mentioned on the grease page aren’t available, any traceable, documented grease that meets the requirements will suffice. I recommend avoiding anonymous “white label”, repackaged, or otherwise unidentified grease unless the seller provides appropriate technical and safety documentation.
Work on the mixer upside down. When starting the job, first remove the rear cover, trim band, and planetary drip ring while the mixer is upright. Then, invert the mixer into a supportive cradle (use a towel to protect the finish) or have a helper support the machine. On a tilt-head model, loosen the hinge pin set screw and use a punch to drive out the hinge pin, and lift off the pedestal base. On a K5 machine, remove the four large screws at the top of the bowl column and lift away the base assembly. You’ll have much better access to the internals, and it’s much easier than trying to wrestle around a heavy motor and upper housing during disassembly and reassembly.
Clean out all the old grease. Every bit of it. A tongue depressor or similar flat crafting stick is effective for taking out large globs of old grease. A toothpick or a dental cement spatula is good for getting grease out of tight spaces such as gear teeth, and you can wrap a soft cloth around it to get into the corners of the upper gear case. You can use a light solvent such as mineral spirits or an aqueous degreaser to clean the metal parts. (Brake parts cleaner is very fast but very expensive.)
Wipe out the inside of the gear case and lower housing using a soft cloth and isopropyl alcohol. This will ensure that all of the old grease and wear products are removed, and there isn’t enough old grease left behind to cause any compatibility issues with the new grease.
If you have (or have access to) a parts washer or large ultrasonic cleaner, these can be huge time savers.
Always replace the groove pins, gasket, and O-ring. These are consumable maintenance parts. Reusing a groove pin (from the planetary or pinion drive) creates a risk that the pin will come out of place while the mixer is running. A used gasket or O-ring will allow leaking of grease and/or separated oil out of the gear case.
Keep track of the fiber washers. The center shaft (drive shaft) has a minimum of two washers on it: one is under the main gear, and the other is above the planetary. There may be more than one in either location. When disassembling the mixer, keep careful track of where the washers were, and put them back in the same locations they came from. If you lose track of where the washers go, examine each one closely. If there are only two washers, one of them will have a ring indented around the center hole; this one goes above the planetary. If there are three, then two of them may have these indentations, and if so both of them go above the planetary.
Watch a couple of videos. Some steps during reassembly can be a little tricky, such as joining the case halves, getting the planetary shaft holes to line up so that you can insert the pin, and setting the drip ring on. Here’s a YouTube playlist with some short videos, each of which shows a different part of the assembly process.
Updated: 6/20/2026
I get that question pretty often.
The short answer is… well, there is no short answer.
Mostly, the question that’s really being asked is:
Tilt-Head or Bowl-Lift?
The tilt-head KitchenAid mixers are excellent all-around machines. For most folks buying their first KitchenAid mixer to do general baking and food prep (with attachments), this would be my recommendation. They can also knead bread, but you’ll find that with heavier dough and larger batches, the head torques around the hinge pin. (This doesn’t disqualify them as bread machines; it’s just something to watch for.) The tilt-heads are also better at small batches (such as whipping two or three egg whites) because the standard adjustment gets the beater/whip closer to the bottom of the bowl.
KitchenAid’s tilt-head models differ only in style, color selection, and included accessories — inside they are all identical. So, you can buy a Classic, or an Artisan, new, refurbished, whatever. (The one exception to this is the Artisan Mini, which I’ll get into below.)
The bowl-lift machines excel at larger batches and heavier loads. This is because the head of the mixer is securely bolted to the bowl lift column, and there is very little room for additional motion under load. The gear trains in the “Pro” series (the “new generation” machines, produced starting in the early 2000s) are more durable (but not indestructible), and with the spiral dough hook, they’re excellent at kneading.
The “Pro Line” and “Commercial” models which have an integrated DC motor/drivetrain assembly are very nice. These have larger bowl capacities and quieter drivetrains than the older Pro series, quieter drive trains, and perform about the same. The integrated drive assembly is nonserviceable, but the cost of a repair part when you wear it out is offset by (relative) ease of replacement.
The older K5-type bowl-lift machines, if you’re fortunate enough to find or buy a used one, are also excellent. They’re built on the same internal architecture as the K45-type tilt-heads, and use the internal same parts for maintenance and repair.
Absolutely. If you’ve got the counter and/or storage space, get one of each, and use each to its strengths. (They can drive the same attachments, too.)
What’s Wrong with the Artisan Mini?
The Artisan Mini is something of an odd mixer out. There’s nothing wrong with it, but there are no serviceable internal mechanical parts. If it breaks, you have to replace the entire motor and transmission assembly, since no individual service parts are available. The part number for the drive unit is W10887355 and it costs about US$85 or so.
The Artisan Mini also has a significantly smaller bowl, and so it isn’t well suited for enthusiast work. In my opinion you’d be better off making space for a Classic or Artisan, if you can. But if the Artisan Mini fits your needs better, by all means it’s a good choice.
The Hobart N-50
If you’ve got US$4,000 to spend on a mixer and want the absolute last word in a countertop machine, get this. It’s got three speeds, you need to switch it off before you can change gears, and servicing it is an absolute nightmare (and yes, I’ll do it) but it can handle anything and will last forever. (And it’ll drive the same attachments as the KitchenAid machines.) It’s likely to be more mixer than you’ll ever use, and it’s like owning an exotic sports car, and all that goes with that.
You may have seen this mixer on TV, or in a video on the Internet. Its human cares a great deal about it — they’ve been through a lot of life’s ups and downs together. Its human also has a very large audience.
One day, a friend was watching a video about this famous mixer suffering from some aches and pains. Knowing my enthusiasm for repairing KitchenAid stand mixers, he sent me a link to a video on YouTube. He said: “This is so sad!” So I started watching.
First, the mixer’s owner mentioned that the head of the machine was loose, but they hadn’t had time to deal with it. “I sent KitchenAid a message on Instagram, but they haven’t gotten back to me yet. I’ve had this machine for a very long time. I don’t want a new one; I just want to fix this one. What do I need to do?” That got my attention.
Then they went to turn the machine on, and crack — the plastic knob on the end of the speed control lever split in two. “I was just praising you! We’ve been together for a long time, and now, this breaks?!”
So, yeah: it was sad.
(Side note: One thing that really bugs me about the design of the Pro machines is that when the plastic knob cracks [which happens quite frequently on these models], there are basically two choices: try and repair the knob [which is a hit-or-miss proposition], or replace the entire speed control board assembly, which is ridiculously expensive. [$60-80, depending on where you buy it.] Ugh.)
Anyway, I contacted the producer of the video, and said (paraphrased): “Hi! I repair these things. I would be absolutely delighted to take care of your machine. Based on what I saw, here’s what I recommend. And here are some Google photo albums of work that I’ve done, and a link to a web site where I’ve been writing about this stuff. And I live not-very-far-away, so we could arrange pickup and drop-off pretty easily.”
And they wrote back! They were very happy that I got in touch and that I was willing to do the work. We exchanged details, I collected the mixer, and got it on to the bench. (And I promised to take many photos as well.)
The new arrival.
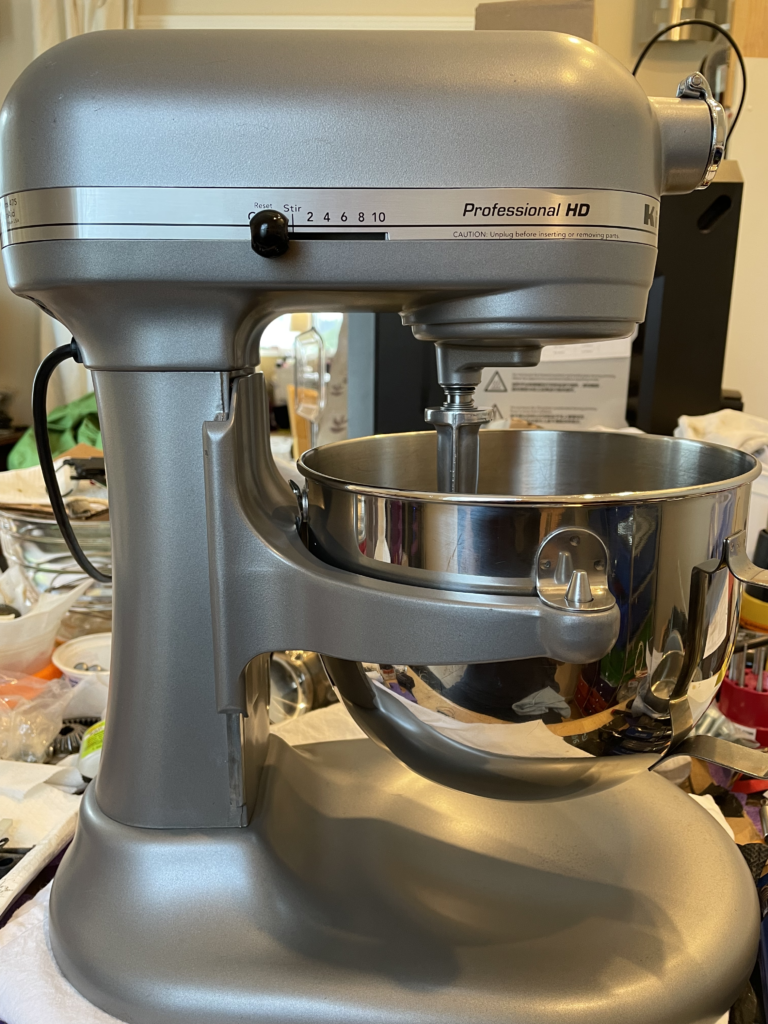
This machine is a “Professional 5 HD”. It’s an interesting combination of attributes: the structure and drivetrain are the modern “Pro” series, with fully electronic speed control and a metal worm follower gear (which makes for a more durable drivetrain that can handle heavier loads).
At the same time, though, this model uses the old-style 5 quart bowl with straight sides, same as the original K5 that dates back sixty-odd years. The Pro 5 HD also uses the same accessories (beater, whip, and dough hook) as the K5/KSM5 series. I think that’s pretty awesome.
On to the repairs. First: floppy head.
The screws holding the head onto the top had loosened up with time and vibration. Those I dealt with: new screws with hex socket heads, lock washers, and Loctite ensure that they won’t be loosening up on their own again.
New head screws, nice and tight. No more wobble!
Then on to the drive train maintenance. This was a natural step; in order to deal with the screws, the motor had to come out anyway, and that meant opening the gear housing. It was due for grease service. The motor shaft seal was so leaky that when the oil separated out of the original grease, the oil leaked out past the shaft seal into the body of the mixer and accumulated anywhere it could — base of the mixer, behind the trim band, you name it.
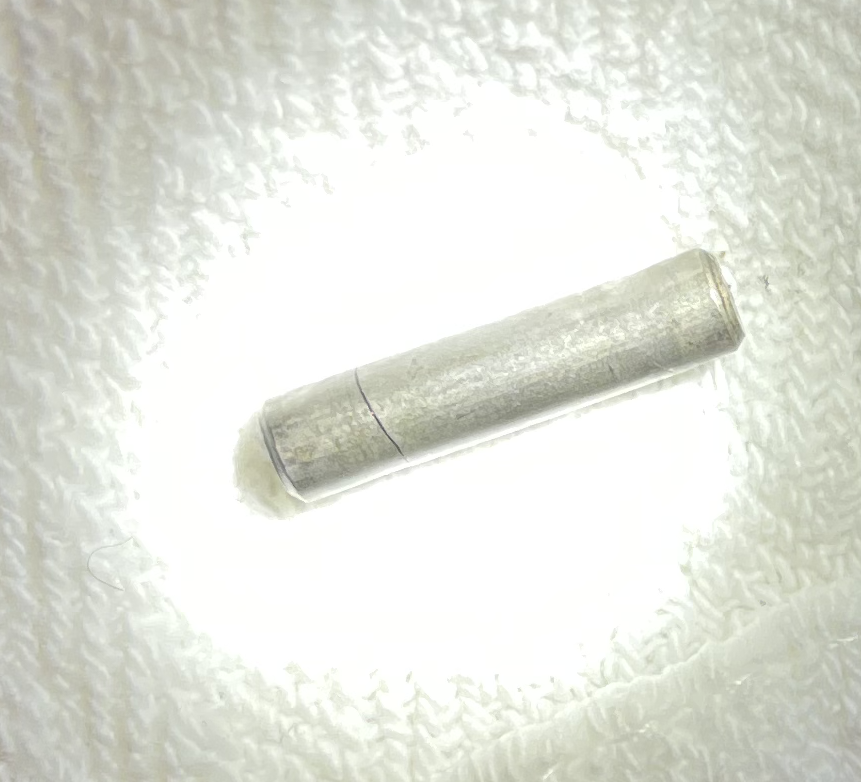
The planetary shaft was showing signs of uneven wear, and the pin which holds the gear stack in place was cracked. Whatever cracked the center pin also galled the hole in the planetary shaft which passes the pin, so I actually had to tap the planetary shaft out with a hammer.
Something gave this pin more than it could handle, once upon a time.
With a cracked pin and a damaged center shaft, time for a new shaft and pin — except that, unlike the old machines, the planetary assembly is pressed together and the shaft can’t be replaced separately. So, time for a new planetary. Bleh. (This bothers me because it’s engineered that way to reduce the cost of assembly, but incurs greater expense when repairs are inevitably necessary.)
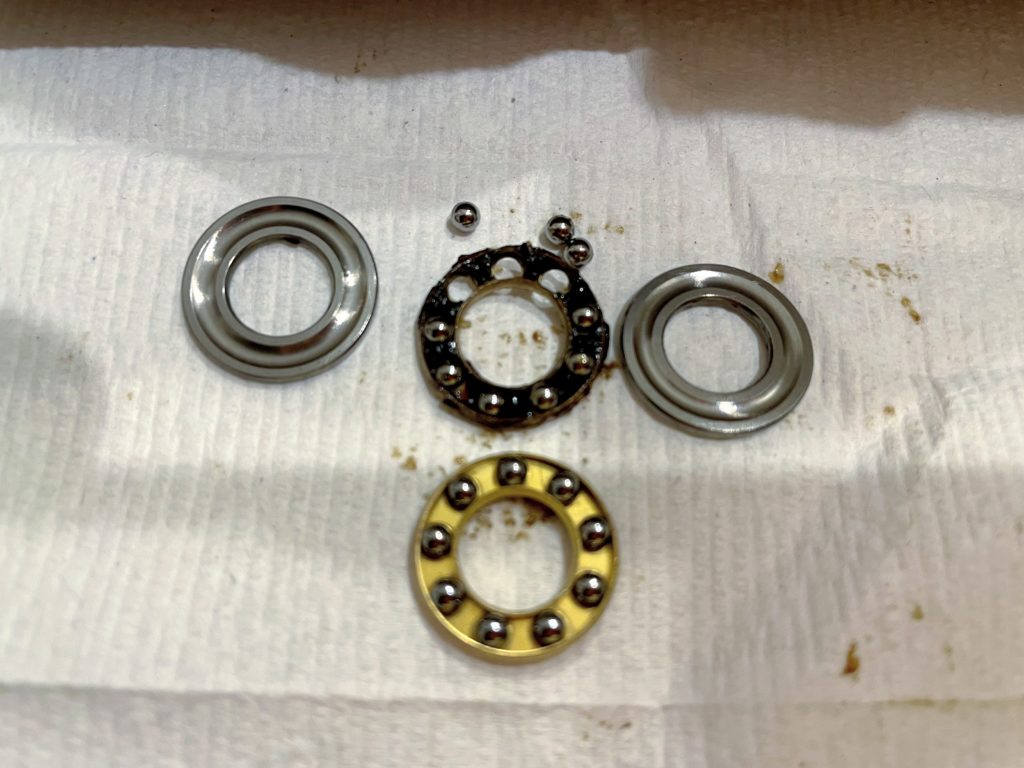
Moving on: when servicing a machine that uses the “Pro” series drivetrain, especially an older or heavily used one, I usually replace the thrust bearing on the main shaft. In this case there was a clear hint: when disassembling for cleaning, three ball bearings fell out of the thrust bearing’s race. They’re not supposed to do that.
The old bearing race (top center) lost some of its ball bearings. Time to replace it!
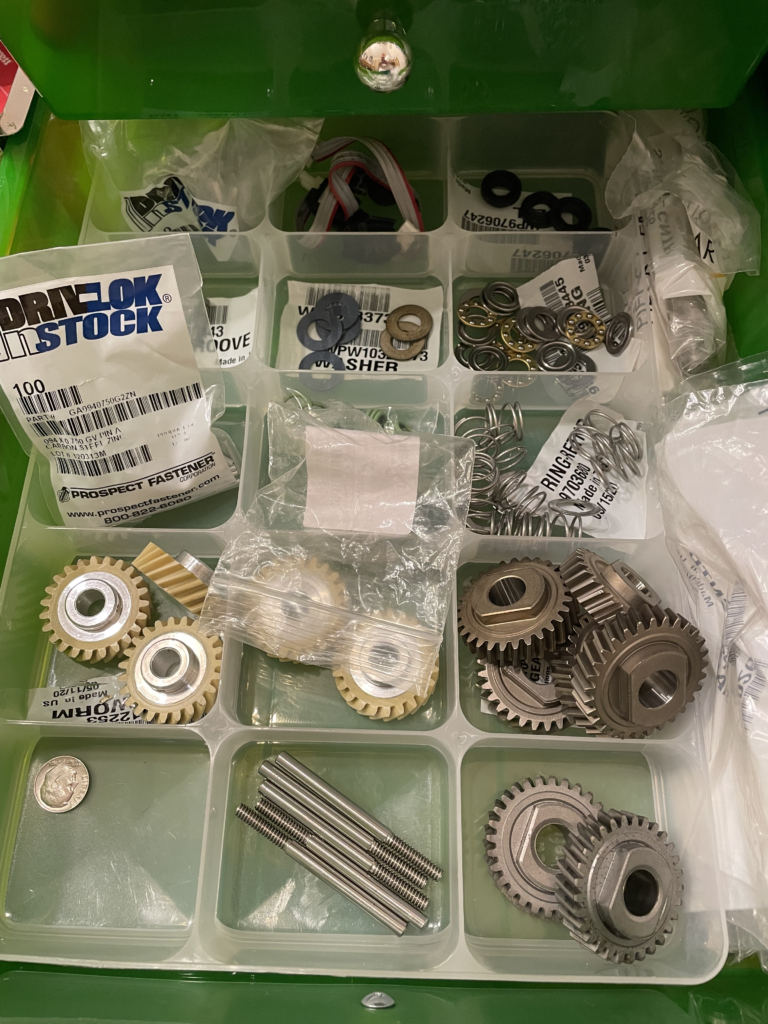
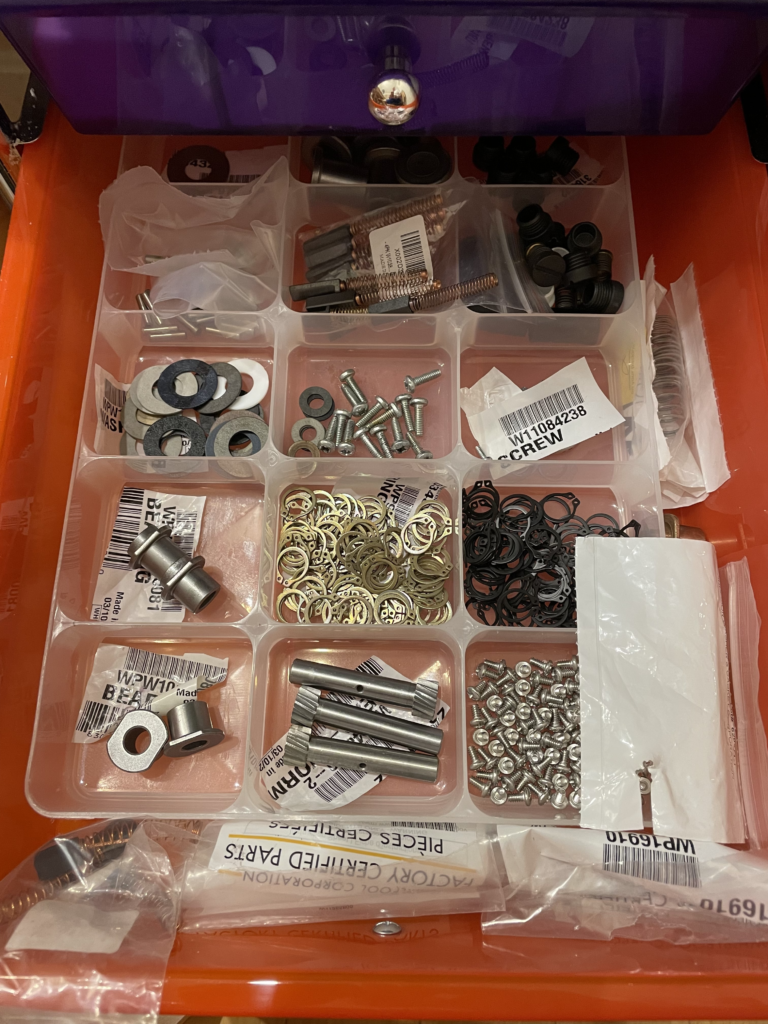
…fortunately, I have plenty of spare parts on hand.
After reassembling the mechanicals and making sure everything ran properly, I glued the knob back together (the owner wanted to keep as many original parts in service as possible, and things like that add character. Then I used gap-filling cyanoacrylate (basically, “super glue” but a little less runny) to reattach it to the lever. It seems to be holding. If it breaks again, I’ll try something else.
The rest of the job went as planned.
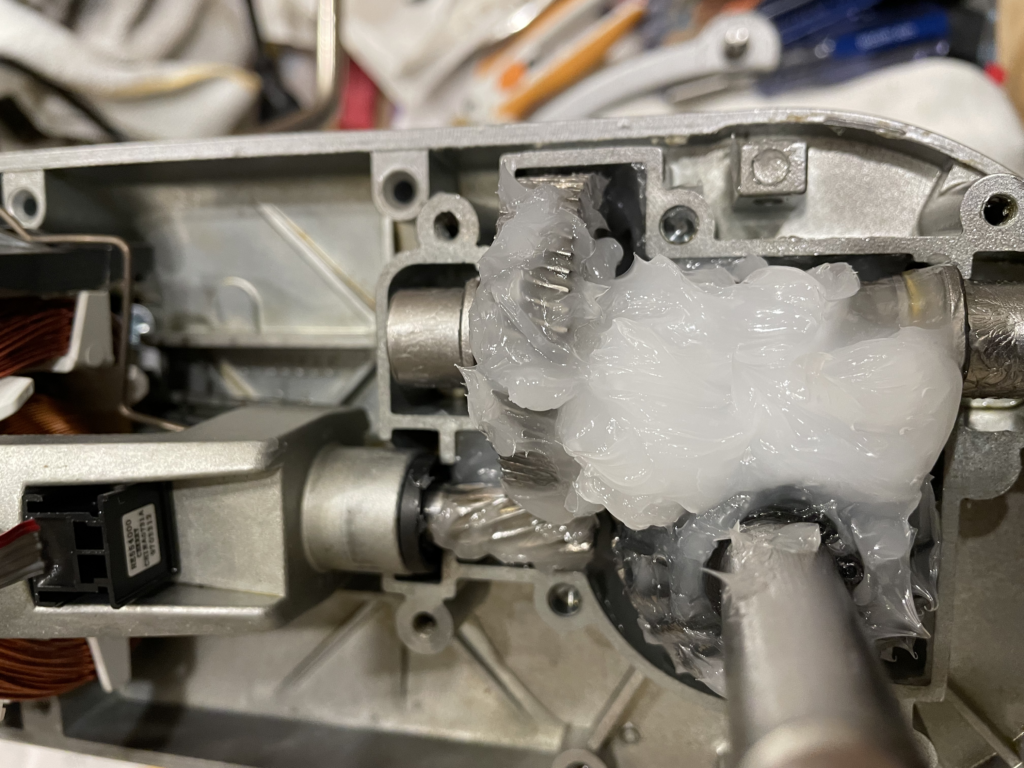
All cleaned up, fresh grease, ready for the gear housing to go back on.
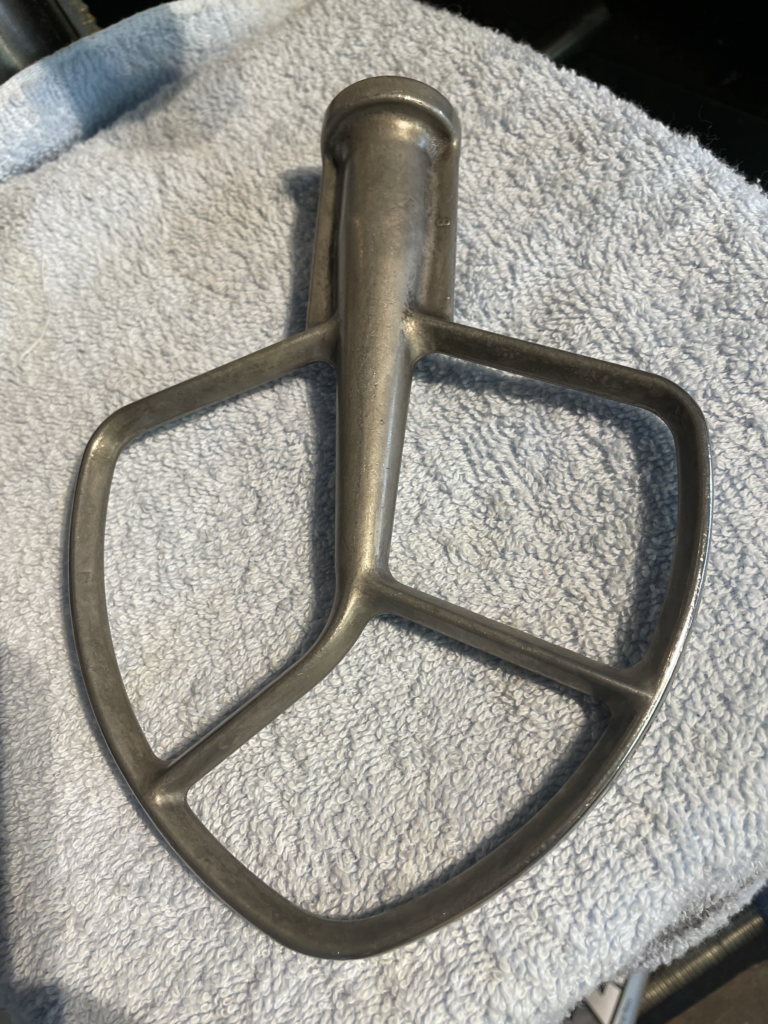
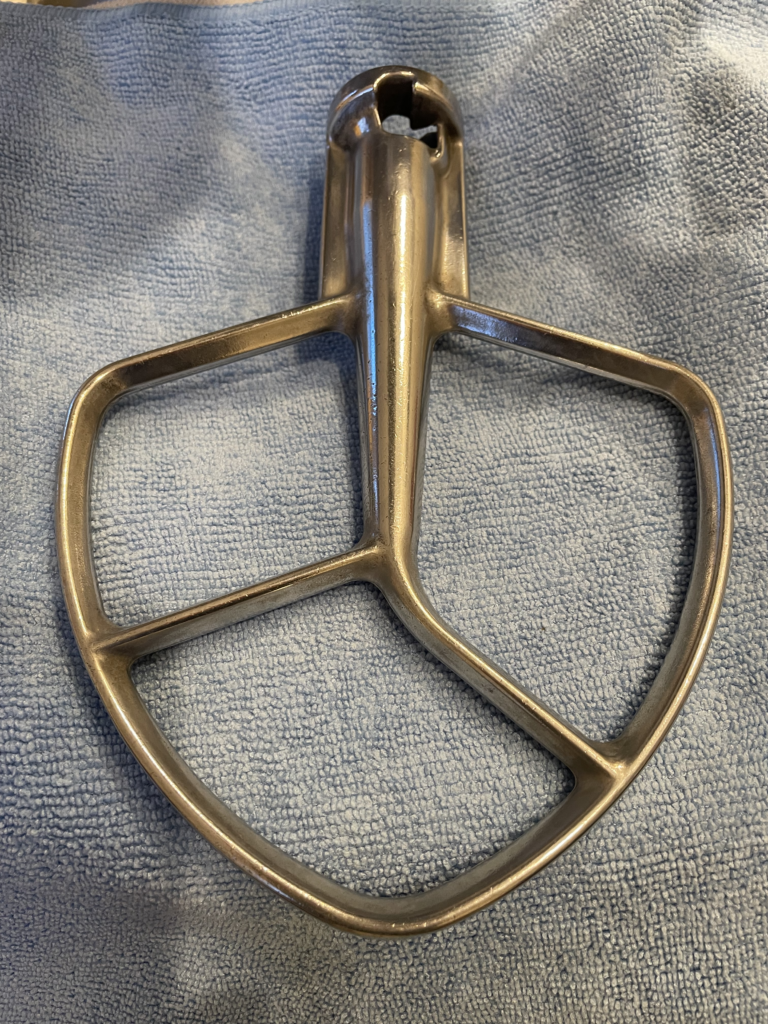
I took extra time to polish up the flat beater and the bowl that the customer provided. (A movie star has to look their best!)
All it takes is one run through the dishwasher to dull the finish.After some careful polishing and high-speed buffing, we’ve got a nice shine back.
Then to the mandatory quality-assurance checks.
Integration work product checks out.Bruno the African Grey likes the color.
I like to use the Japanese Milk Bread Rolls recipe from King Arthur Baking; it’s not super-difficult as bread recipes go, and the bread has a lovely texture and keeps for a long time. Since this is a heavy-duty machine, I doubled the batch to make it an extra-tough test. (The loaves look different because I sprinkled one with cinnamon sugar, and the other with Penzey’s Fox Point seasoning.)
And there you have it! It looks great on the outside, and works great on the inside.
All done! Everything shined up nicely, and the machine works great.
If you have a technical question or think you might like me to repair your mixer, please get in touch! Any information you provide in the process of contacting me for any reason will remain private. That includes (but is not limited to) your name, location, contact information, and your mixer’s serial number.
And you, too, can get the movie-star treatment.
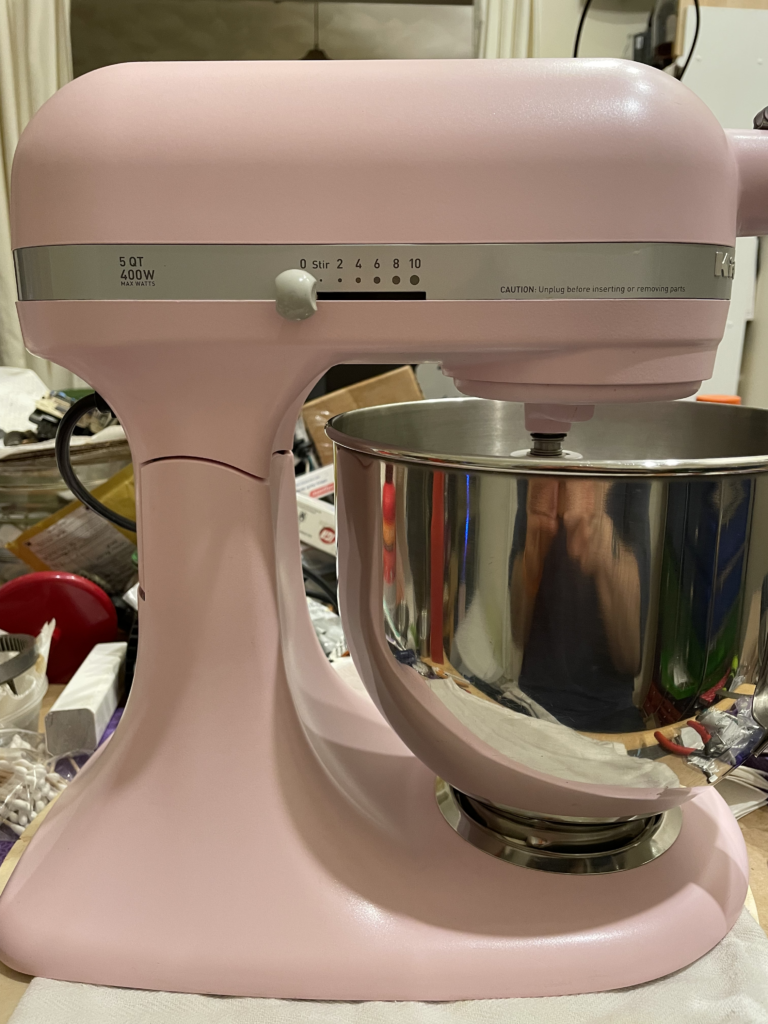
This is Flossie (she’s pink like candy floss), but nobody calls her that more than once. To all the folks at the diner she’s “Flo”.
Flossie is an example of an extremely rare specimen: the Accolade 400. This is a tilt-head that KitchenAid made for a little while in the early 2000s, and then discontinued. (Do you have friends at KitchenAid? I have Many Questions about the production history of this machine.)
The motor and drivetrain are the same as the modern “Pro” series machines: unitary motor made by Ankarsrum, electronic speed control, non-serviceable planetary, brass “sacrificial” gear, compact enclosed gear train. This is good, so that if anything breaks it can be serviced with modern parts. It also means that the Accolade can do pretty much anything the Pro series can, within the limits of its bowl size.
One interesting feature about this machine is that the tilt lock can lock the head down *or* up. So you can raise the head to do stuff like remove the beater or scrape it down, and not worry that the head will slam down while you’re doing it.
The not-so-good: none of the model-unique parts are available anymore. The lower gear case, the tilt lock mechanism, and all of the color parts are NLA. (That’s especially unfortunate in the case of the planetary, which is the modern pressed-together design and it will probably fail some day.)
This machine also uses a unique bowl, which has a unique base that is not compatible with the other screw-mount bowls, has straighter sides than the standard bowl, and which is (you guessed it) No Longer Available. So if you get your hands on an Accolade and don’t have a bowl for it, good luck.
Fun fact about the bowl: it’s not a simple matter of adapting the base to fit the standard twist-on bowl, and KitchenAid clearly went out of their way to make this anything but a simple matter of switching bowl mount plates. In particular, the hole patterns on the different mount plates don’t line up; and the bowl base on the standard bowl is smaller than the Accolade bowl.
KA did this because the Accolade planetary has a larger radius than the standard one — it’s the same planetary as the Pro series — so even though the Accolade uses the same accessories as the standard tilt-head, the beater would slam into the sides of the standard bowl in use. The Accolade bowl accommodates this by having straighter sides than the standard bowl (which itself tapers in more toward the bottom). So, even if you could make an adapter for the bowl base, you still wouldn’t be able to use a K45/Artisan bowl with the Accolade.
Flossie had a bit of a hard road getting here. She was listed on eBay as “EUC” (Excellent Used Condition), and arrived anything but, due to poor packing. The hinge cover over the accessory drive was twisted, the tilt lock lever was bent, the accessory hub thumb screw was cracked, she picked up a small dent on her rump, and there were scuffs and scrapes everywhere. Fortunately, the worst of it was repairable and most of the scuffs buffed out.
Hi, Flo.
The Pink Satin is a *really* nice finish. It’s hard to see in this photo, but there’s a little sparkle to it which really comes out under bright lights.
The story begins the usual way: eBay listing of a mixer being sold “for parts or not working”, cheap. Had a bit of conversation with the seller, “it’s running a little rough”. No problem. I provide my usual packing advice (because the seller had never done this before), Buy It Now, shipped, done.
Then the story takes a twist.
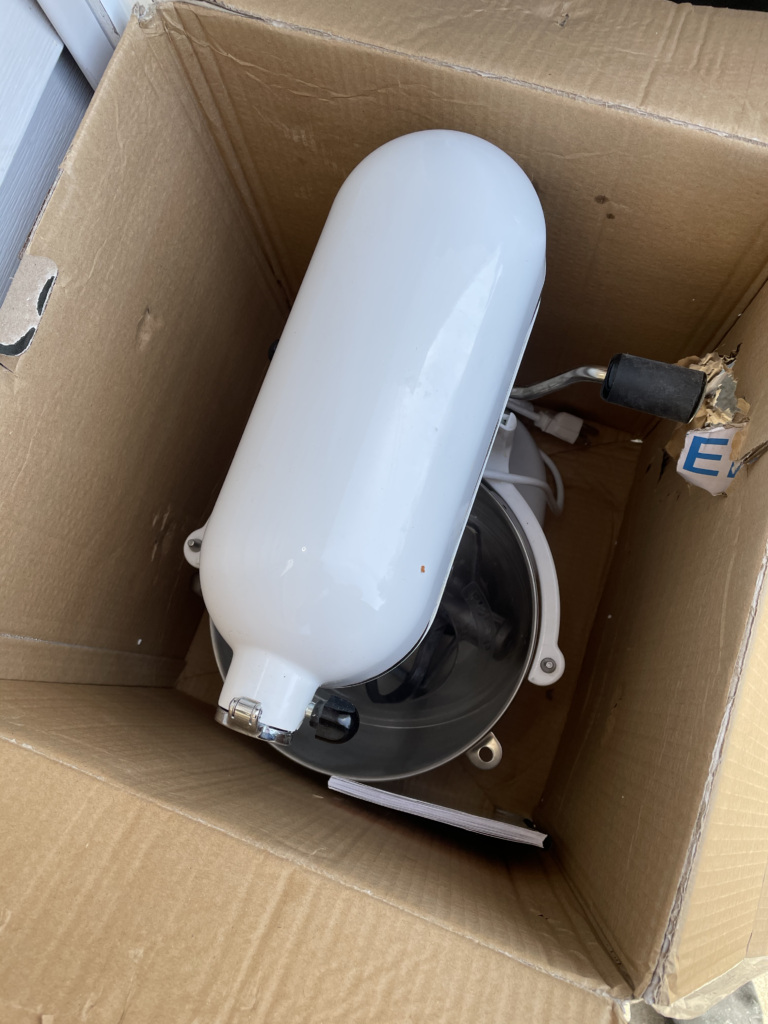
The package arrives, shipped via USPS. The letter carrier said, “Sorry, we know what’s in it. We picked it up by the handle and the mixer fell out. All the tape that’s on there, we put there to keep the box from falling apart.”
I look in the box, and see this:
That’s right — no bubble wrap to protect the machine, no accessories wrapped to prevent them from bouncing around, no balls of paper to keep the mixer from shaking around in the box and breaking things. It’s almost as though the seller used my packaging advice as a list of what not to do.
Amazingly, the only shipping damage is some scuffing on the end of the bowl crank handle (you can see where it poked out through the box).
So, let’s look at the “running rough.” Turn it on and it sounds like it’s grinding gravel in a coffee can.
OK, off comes the top of the machine. (This is easier on the Pro machines than on the tilt-head or K5s, but it’s one of the few things about the Pro that I consider an improvement.)
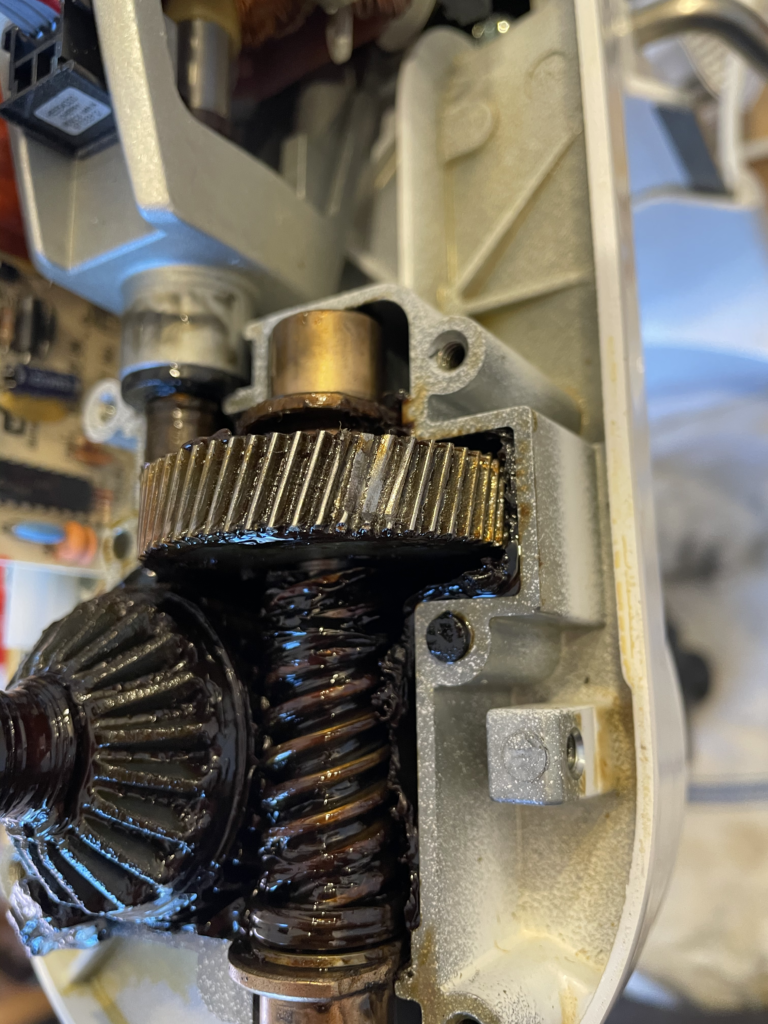
First thing we come to is the cracked plastic gear housing.
The early-production Pro series used a plastic housing, which was prone to cracking. It was bad enough that KitchenAid actually had a recall, which included replacement of the housing with a redesigned metal one.
Not only does the crack let grease out (you can see where it leaked into the rest of the machine), but a cracked plastic gear housing frequently leads to catastrophic failure in the gear train. This is because the gear housing has slots in it which keep the drive shaft bearings in place. When the housing cracks, the drivetrain shifts (usually while it’s spinning under load), then the main drive gear crashes into the edge on the lower gear case.
Also, one of the plastic alignment posts sheared off the housing and got left in the lower gear case (that circular black bit just below the right of the gear). Getting that out was fun. And more collateral damage: the flanges broke off the shaft bearings and got ground into fine bronze powder.
Fortunately this story has a happy ending; the rest of the machine was fine, and after replacing the gear train, motor shaft seal, and bearings, it all worked great. (I don’t have a picture of the finished machine; it’s a white KitchenAid mixer and we all know what those look like.)
Every so often I encounter someone with a really old machine that needs repair, or even just long-overdue maintenance. The owner is very reluctant to let the machine out of their sight, because it was a treasured gift, or handed down from a loved relative. I totally get it — you never know what can go wrong if you let it leave the house. But really, it’ll be OK. As long as you send your machine to me.
In “You Never Forget Your First” I mentioned the avocado K45 that had been in our family since I was nine or ten. Its current custodian agreed to ship it to me for servicing, because it was due. As an antique it isn’t in daily-use rotation, but it does do its fair share of work around the kitchen.
For its age (roughly 45 years old) this machine is in good condition. Some day it will need a full overhaul, including (probably) new motor bearings. Today, though, the motor was running well and the bearings were in “let’s leave well enough alone” condition.
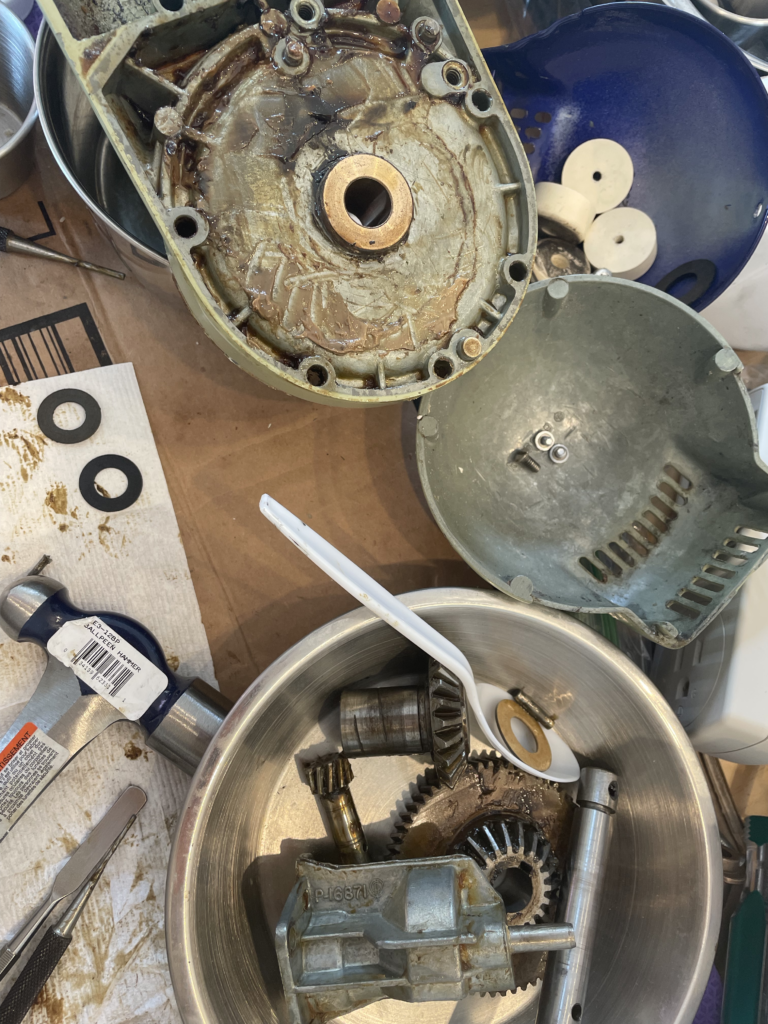
OHAI I just completely disassembled your treasured family heirloom. It’s OK, though.
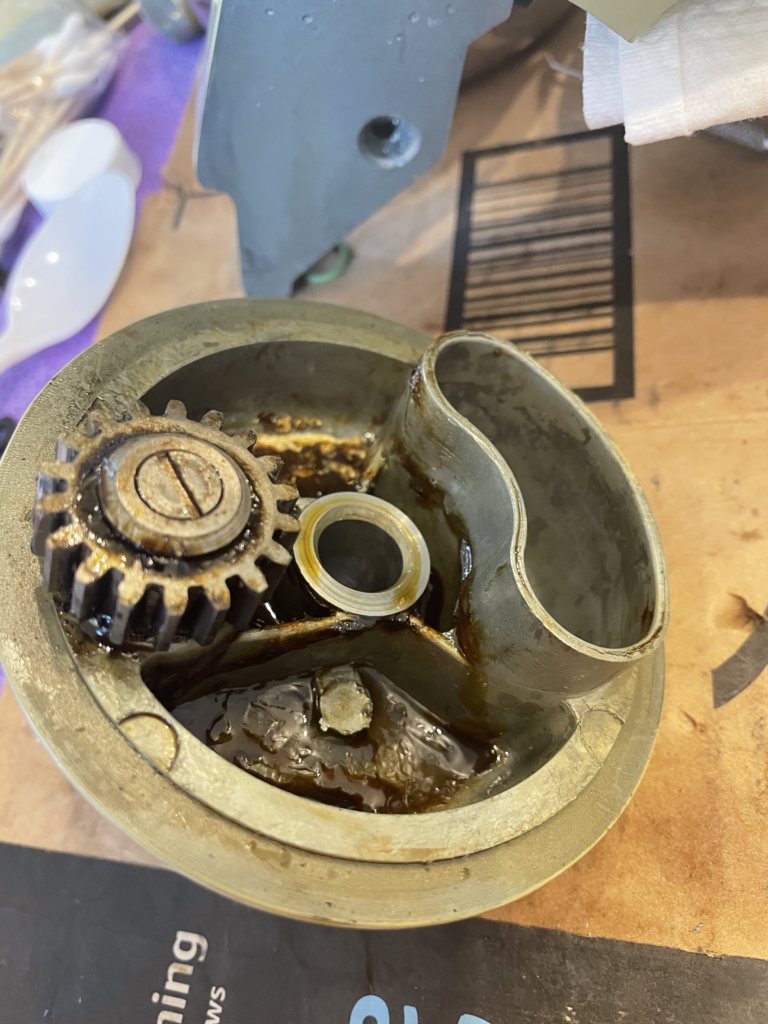
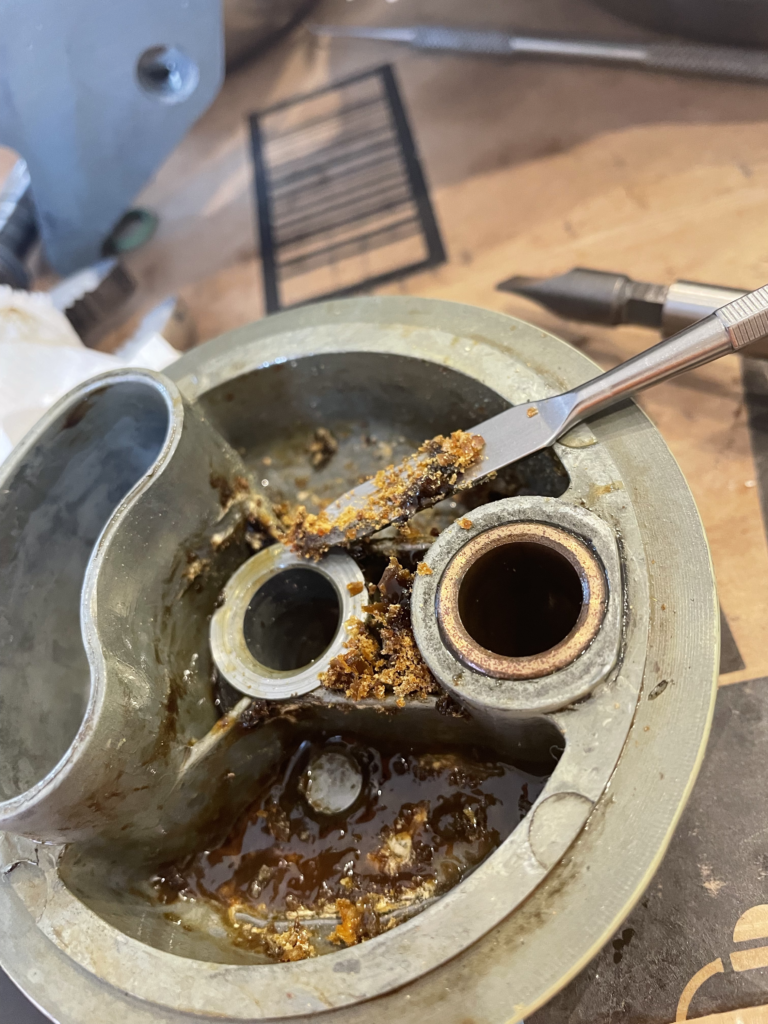
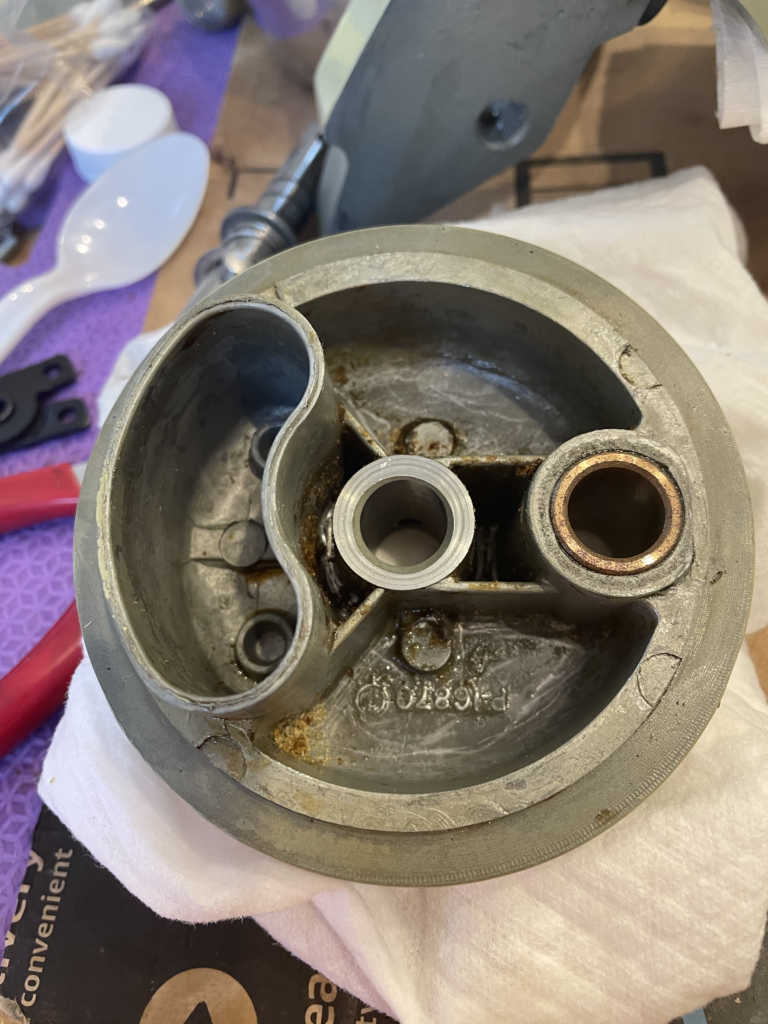
There was remarkable crustification of material in the planetary. Old age and oxidation, I guess. It actually took quite a long time to scrape everything out.
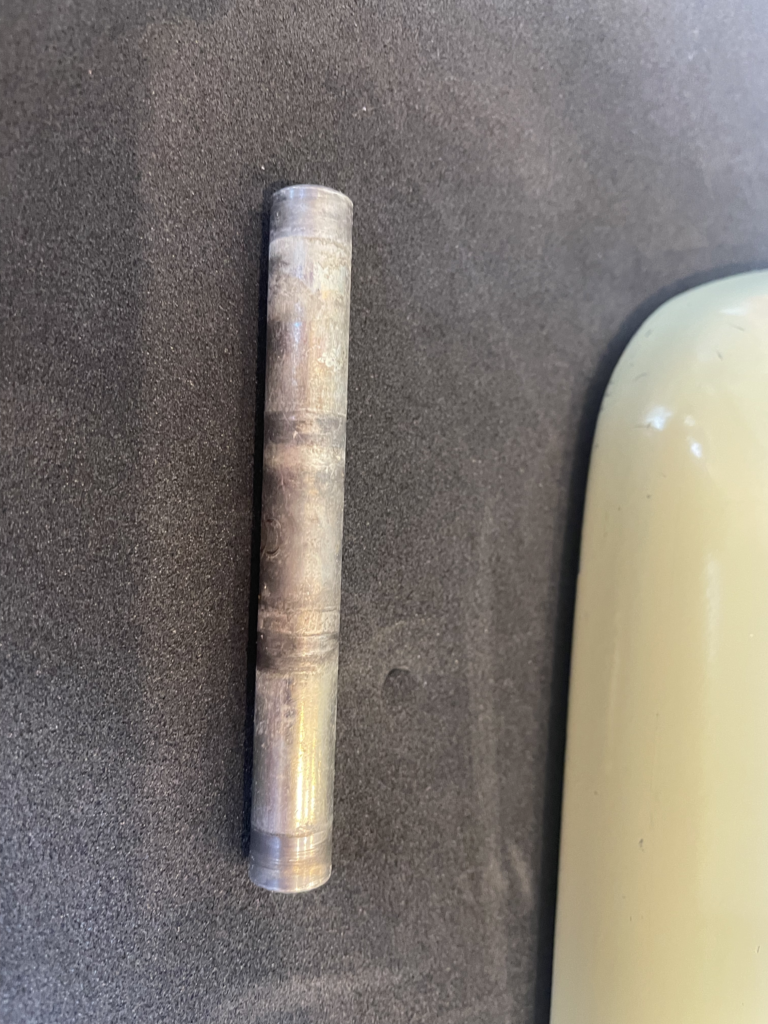
The hinge pin is almost always oxidized; polishing it makes reinsertion easier, and it’s a nice finishing touch because the ends get shiny, which makes the rest of the machine look better when it’s back together.
Shiny hinge pin: before and after.
And here’s the finished work. This machine does have a lot of scuffs and scrapes, which I consider to be character marks. It runs great, though. Just like new.
Self-portrait of the artist as a mixer repairman.
The paint is worn off the trim band in spots, especially by the speed lever. I could replace it with a vintage one in better shape, or even with a modern one; but that wear is part of a proud family tradition, so it’s all good.
Packing your treasured machine for safe transit (even if it’s just a short car ride) is essential. You can get factory packing from KitchenAid; it takes a little convincing to get them to understand that you’re not sending the machine to them for repair, and waive the $25 bench fee. Once you’ve done that, though, you can safely ship or bring the mixer to someone whom you trust to do the job correctly. If it’s a pre-solid-state speed control, experience in working on those machines makes all the difference.
The subject of which grease to use when regreasing your mixer, and how much, can be confusing. There are a lot of arcane terms, and acronyms, and designations, and sometimes it gets to be a bit much. Hopefully the information in this post will help. Table of Contents Glossary of Terms The following technical terms… more →Regarding Grease
KitchenAid stand mixers are both heavy and fragile; this challenging combination of attributes makes it critically important that they be packed carefully for transit, whether in a moving truck or when being shipped. By far the best way to ship a mixer is in the original factory packaging. The packing was carefully designed and engineered… more →Have Box, Will Travel
Safety warning: Doing electrical work on countertop appliances can create the risk of an electric shock, which may be fatal. Always unplug the mixer before starting work on it, and if at all possible the work should be done by a qualified individual. The discussion here is intended to be educational, and not tutorial. Vintage… more →Regarding Power Cord Replacement on Vintage Models